citizen blue angels watch manual pdf

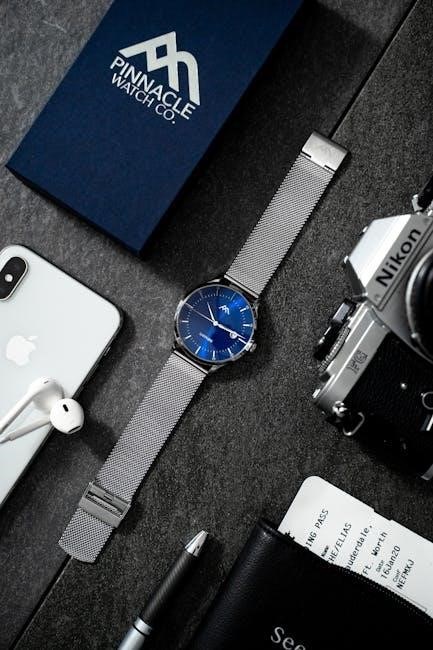
The Citizen Blue Angels watch, inspired by the U.S. Navy’s elite flight squadron, combines Eco-Drive technology with advanced features like chronograph and radio signal syncing for precision and style.

Overview of the Citizen Blue Angels Watch

The Citizen Blue Angels watch, part of the Promaster series, is a sophisticated timepiece inspired by the U.S. Navy’s Blue Angels. It features Eco-Drive technology, solar-powered functionality, and advanced features like chronograph, alarm, and timer. Designed for pilots and watch enthusiasts, it combines precision with durability, offering radio signal reception for atomic timekeeping. Its sleek, stainless steel design and robust construction make it a reliable companion for both aviation professionals and everyday use, embodying the spirit of the iconic flight squadron.

Importance of the Manual for Proper Usage

The manual is essential for understanding and utilizing the Citizen Blue Angels watch’s advanced features, such as Eco-Drive technology, chronograph functions, and radio signal syncing. It provides step-by-step guidance for setting time, date, and alarms, as well as troubleshooting common issues. Without the manual, users may struggle to fully leverage the watch’s capabilities or resolve operational problems. The manual ensures proper setup, optimal performance, and longevity of the timepiece, making it a vital resource for both novice and experienced users.

Locating the Citizen Blue Angels Watch Manual

The official Citizen Blue Angels watch manual is available as a free PDF download on Citizen’s website or authorized retailers, ensuring easy access to setup guides.

Where to Find the Official PDF Manual

The official Citizen Blue Angels watch manual can be downloaded for free from Citizen’s website or authorized retailers. Visit the Citizen support page, enter your watch’s model or caliber number, and access the PDF guide. This ensures you receive the correct instructions tailored to your specific timepiece. The manual is available in English and provides detailed setup and troubleshooting information. Additionally, authorized retailers may offer direct links to the manual, making it easy to find and download.

Model Identification for Correct Manual Selection

Accurate model identification is crucial for selecting the correct Citizen Blue Angels watch manual. Locate the model number, often found on the case back or in the product packaging. Visit Citizen’s official website and enter this number in the provided search tool to access the corresponding PDF manual. Ensure the model number matches your watch exactly, as slight variations may exist between similar models. This step guarantees you receive instructions tailored to your specific timepiece, ensuring proper setup and functionality. Always double-check the number to avoid errors.

Setting Up Your Citizen Blue Angels Watch

Setting up your Citizen Blue Angels watch is straightforward. Use the crown to adjust time, date, and modes. The manual guides you through chronograph, alarm, and radio sync features with ease.

Time and Date Setting Instructions

To set the time and date on your Citizen Blue Angels watch, pull the crown to position A and rotate it to adjust the time. Use the lower button to advance the minutes and hours. For the date, pull the crown to position B and rotate it. Ensure the watch is in the correct mode (time, alarm, chronograph, or timer) before making adjustments. Refer to the manual for detailed steps on syncing with radio signals for atomic accuracy and proper operation of Eco-Drive technology.

Using the Crown for Adjustments

The crown is a key component for adjusting your Citizen Blue Angels watch. Pull the crown to position A to set the time and date. Rotate it clockwise or counterclockwise to adjust the time, and use the buttons to advance minutes and hours. For date adjustments, pull the crown to position B and rotate it. Ensure the watch is in the correct mode before making adjustments. Proper use of the crown ensures accurate timekeeping and functionality of features like the chronograph and alarm. Always refer to the manual for detailed guidance;

Syncing with Radio Signals for Accuracy

Your Citizen Blue Angels watch can sync with radio signals for precise timekeeping. Ensure the watch is in an area with strong signal reception, typically near a window facing the signal source. The watch automatically adjusts to the correct time and date when it detects the signal. For optimal performance, sync the watch daily, especially when traveling across time zones. If syncing issues occur, refer to the manual for troubleshooting steps to ensure accurate atomic timekeeping. Proper signal reception is essential for maintaining the watch’s precision.

Troubleshooting Common Issues

Address common issues like inaccurate timekeeping or Eco-Drive charging problems by consulting the manual. It provides step-by-step solutions to ensure optimal performance and functionality of your watch.

Identifying and Resolving Common Problems

Common issues with the Citizen Blue Angels watch include timekeeping inaccuracies, Eco-Drive charging problems, and button malfunctions. Consult the manual for diagnostics. For time errors, sync with radio signals or adjust manually. Charging issues may result from insufficient light; expose the watch to direct sunlight. Button malfunctions can often be resolved by resetting or cleaning. The manual provides detailed troubleshooting steps to restore functionality. Regular maintenance and proper care are essential to prevent recurring issues and ensure optimal performance.

Troubleshooting Eco-Drive Charging Issues

Eco-Drive charging issues occur when the watch lacks sufficient light exposure. Ensure the watch face is clean and exposed to direct sunlight for at least 6 hours. Avoid prolonged use in low-light conditions, as this depletes the power reserve. If charging issues persist, consult the manual for reset procedures or check for obstructions blocking light absorption. Proper care and regular light exposure are crucial to maintain the Eco-Drive system’s efficiency and ensure accurate timekeeping. Refer to the manual for detailed troubleshooting steps to resolve charging-related problems effectively.

Maintenance Tips for Longevity

Regularly clean the watch face and band to prevent dirt buildup. Store in a cool, dry place when not in use. Ensure adequate light exposure to maintain Eco-Drive efficiency.

Cleaning and Care Instructions

Regular cleaning is essential for maintaining your Citizen Blue Angels watch. Use a soft, dry cloth to wipe the case and bracelet, avoiding harsh chemicals. For stubborn dirt, dampen the cloth slightly but ensure no moisture enters the watch. Avoid exposing the watch to extreme temperatures or direct sunlight for prolonged periods. Store it in a cool, dry place when not worn. Proper care ensures optimal performance and extends the watch’s longevity. Refer to the manual for detailed cleaning guidelines.

Power Reserve Management

Your Citizen Blue Angels watch features an Eco-Drive system, powered by light energy. Ensure it receives adequate light to maintain the power reserve. Avoid prolonged darkness, as this may drain the reserve. The watch includes a low-power warning, alerting you when charging is needed. Store it in a bright environment when not in use. Optimal performance is achieved when the power reserve is at its highest level. Proper management ensures accurate timekeeping and extended battery life, enhancing your watch’s reliability and durability over time.

Frequently Asked Questions

How do I charge my Eco-Drive watch? Exposure to light replenishes the power reserve. For time setting, refer to the manual or sync with radio signals for accuracy.

Why isn’t my watch keeping time? Ensure proper Eco-Drive charging and sync with radio signals. Consult the manual for troubleshooting or reset instructions if necessary.

Answers to Common Queries

How do I charge my Eco-Drive watch? Exposure to light replenishes the power reserve. For time setting, refer to the manual or sync with radio signals for accuracy.

Why isn’t my watch keeping time? Ensure proper Eco-Drive charging and sync with radio signals. Consult the manual for troubleshooting or reset instructions if necessary.

Where can I find the manual? Download the official PDF manual from Citizen’s website by entering your watch’s model or caliber number. Ensure correct functionality by following the guide.

Can I adjust the time manually? Yes, use the crown to set the time and date. Detailed steps are provided in the manual for precise adjustments.

How do I use the chronograph? Press and hold the crown to cycle through modes. The manual provides clear instructions for operating advanced features like alarms and timers.

Understanding Watch Features and Functions

The Citizen Blue Angels watch features Eco-Drive technology, a solar-powered system converting light into energy; It includes functions like time/date setting, chronograph, alarm, and timer modes. The watch syncs with radio signals for atomic timekeeping, ensuring accuracy. Additional features include a perpetual calendar and power reserve management. Refer to the manual for detailed explanations of each mode and function to maximize the watch’s capabilities and maintain optimal performance. Proper use of these features enhances user experience and watch longevity.

Advanced Functions of the Watch

The Citizen Blue Angels watch offers advanced features like chronograph, alarm, and radio signal syncing for precise timekeeping, enhancing functionality and user experience with Eco-Drive technology.

Using the Chronograph and Alarm Features

The Citizen Blue Angels watch features a built-in chronograph for precise event timing and an alarm function for reminders. To activate the chronograph, press the crown to cycle through modes. Use the upper button to start/stop and the lower button to reset. The alarm can be set via the crown’s rotational control. Ensure the watch is in the correct mode before adjusting. Refer to the manual for detailed step-by-step instructions to maximize these functionalities. Proper usage ensures optimal performance and longevity of the timepiece.

  • Press the crown to access chronograph mode.
  • Start/stop timing with the upper button and reset with the lower button.
  • Set alarms by rotating the crown to the correct position.

These features enhance the watch’s versatility while maintaining its Eco-Drive efficiency, even in low-light conditions.

The Citizen Blue Angels watch manual provides essential guidance for optimal use, ensuring Eco-Drive efficiency and full functionality of its chronograph and alarm features for precise timekeeping.

Final Thoughts on Using the Manual Effectively

Using the Citizen Blue Angels watch manual effectively ensures optimal performance and longevity. It guides users through setup, troubleshooting, and maintenance, maximizing Eco-Drive technology and advanced features like chronograph and alarms. By following the manual, users can resolve common issues, manage power reserves, and keep their watch accurate and functional. Regular cleaning and proper handling, as outlined, prevent damage and extend the watch’s lifespan. Referencing the manual regularly enhances the overall ownership experience, making the Citizen Blue Angels watch a reliable and stylish timekeeping companion.

drive cruiser 3 wheelchair user manual

The Drive Cruiser 3 Wheelchair is a lightweight‚ durable‚ and adjustable mobility solution designed for active users‚ offering comfort and ease of use with its robust aluminum frame.

1.1 Overview of the Drive Cruiser 3 Wheelchair

The Drive Cruiser 3 Wheelchair is a lightweight‚ durable mobility solution designed for active users. It features an aluminum frame‚ adjustable seat depth‚ and backrest for comfort. The chair is easy to maneuver and fold‚ making it ideal for everyday use and transportation‚ with a weight capacity of 300 lbs.

1.2 Key Features and Benefits

The Drive Cruiser 3 Wheelchair features an adjustable seat depth‚ foldable design‚ and a weight capacity of 300 lbs. Its lightweight aluminum frame ensures durability and ease of transport. The chair offers customizable comfort with an adjustable backrest and is designed for stability and maneuverability‚ making it ideal for daily use and travel.

Safety Precautions and Guidelines

Always engage wheel locks before entry‚ exit‚ or leaning forward. Maintain the center of gravity for stability and follow usage guidelines to ensure safe operation.

2.1 Wheel Locks and Stability

Engage both wheel locks before entering‚ exiting‚ or leaning forward. Ensure locks are fully secured by pressing down firmly and checking for stability. Maintain the center of gravity to prevent tipping for safe operation.

2.2 Weight Capacity and Usage Limits

The Drive Cruiser 3 Wheelchair has a maximum weight capacity of 300 lbs. Always adhere to this limit to ensure stability and prevent damage. Exceeding the weight capacity can compromise safety and longevity of the chair.

2.3 Important Safety Warnings

Always engage wheel locks before entering‚ exiting‚ or leaning forward in the chair. Maintain the center of gravity during use to prevent tipping. Avoid sharp turns or excessive inclines‚ as this may compromise stability. Follow weight capacity guidelines strictly to ensure safe operation.

Assembly and Adjustments

The Drive Cruiser 3 Wheelchair requires careful assembly and adjustments for optimal use. Follow the manual to unfold‚ adjust seat depth‚ and configure backrest for proper fit and comfort.

3.1 Unfolding and Preparing the Wheelchair

Unfolding and preparing the Drive Cruiser 3 Wheelchair involves ensuring the frame is fully open and stable. Adjust the seat depth by extending the screw on the cross brace‚ then upright the backrest. Ensure all parts are securely locked and check for proper alignment before first use.

3;2 Adjusting the Seat Depth and Backrest

Adjust the seat depth by loosening the bolt on the extension screw located on the upper cross brace. Extend or shorten the seat rail as needed‚ then tighten securely. The backrest can be adjusted by loosening the knobs and tilting to the desired position‚ ensuring proper support and comfort for the user.

3.3 Configuring the Footrest and Armrests

Adjust the footrest height using an Allen wrench to ensure proper leg support. The armrests can be raised or lowered by loosening the bolts‚ allowing for comfortable access to surfaces. Both adjustments ensure optimal positioning for user comfort and ease of mobility.

Operating the Wheelchair

Ensure smooth operation by engaging wheel locks when stationary and maintaining proper posture. Use ergonomic handles for steering and maneuvering‚ ensuring safety and comfort during use.

4.1 Getting In and Out Safely

To ensure safe transfer‚ always engage the wheel locks and position the chair on a stable‚ level surface. When sitting‚ face the chair‚ hold the armrests‚ and lower yourself slowly. When exiting‚ push up from the armrests and swing your legs over the footrests before standing.

4.2 Maneuvering and Steering Techniques

Mastering maneuvering involves leveraging the chair’s adjustable features for optimal control. Users can navigate tight spaces by shifting their weight and using the armrests for balance. To make sharp turns‚ lean slightly in the desired direction while steering with the wheels. Ensure the center of gravity remains stable for smooth movement.

4.4 Using the Wheelchair in Different Terrains

Navigate smoothly on various surfaces by adjusting speed and technique. On uneven terrain‚ reduce speed and use footrests for stability. For inclines‚ ensure the chair is secure and use wheel locks when stationary. Avoid abrupt movements and maintain balance to handle diverse environments confidently with the Drive Cruiser 3’s versatile design.

Maintenance and Care

Regularly clean the wheelchair with mild soap and water‚ avoiding harsh chemicals. Lubricate moving parts and inspect for wear. Follow manual guidelines to ensure longevity and optimal performance.

5.1 Cleaning the Wheelchair

Use mild soap and water to clean the frame‚ upholstery‚ and plastic parts. Avoid harsh chemicals or abrasive materials that may damage surfaces. Rinse thoroughly and dry with a soft cloth. Regular cleaning prevents dirt buildup and maintains the chair’s condition. Avoid cleaning electrical components; wipe gently with a damp cloth only.

5.2 Lubricating Moving Parts

Apply a silicone-based lubricant to moving parts like wheel axles‚ hinges‚ and caster wheels regularly. This ensures smooth operation and prevents wear. Avoid over-lubrication to prevent attracting dust. Clean parts before applying lubricant and reapply every 1-2 months for optimal performance and longevity.

5.3 Checking for Wear and Tear

Regularly inspect the wheelchair for wear and tear‚ focusing on tires‚ upholstery‚ and frame integrity. Check for cracks‚ fraying‚ or excessive wear on moving parts. Inspect every 1-2 months‚ especially after heavy use. Replace worn or damaged components promptly to ensure safety and functionality. Refer to the manual for specific guidance.

Troubleshooting Common Issues

Address common issues like wheel lock malfunctions or folding difficulties by checking for obstructions‚ ensuring proper alignment‚ and lubricating moving parts. Refer to the manual for detailed solutions.

6.1 Wheel Lock Malfunction

If the wheel locks fail to engage properly‚ ensure they are free from obstructions and debris. Clean the locking mechanism‚ then test by applying firm pressure. If issues persist‚ contact technical support for assistance or replacement parts.

6.2 Difficulty Folding the Chair

If folding is challenging‚ ensure the footrests are fully upright and the seat is clear of obstructions. Check for proper alignment of folding mechanisms and apply gentle‚ consistent pressure. If issues persist‚ consult the user manual or contact customer support for further assistance.

6.3 Addressing Frame Instability

Check all screws and bolts for tightness‚ as loose components may cause instability. Ensure proper folding and unfolding techniques are used. Maintain weight distribution evenly and avoid exceeding the recommended weight capacity to preserve frame integrity and stability during use.

Warranty and Support

Your Drive Cruiser 3 Wheelchair is backed by a lifetime warranty for the original purchaser‚ ensuring coverage against defects in materials and workmanship‚ with dedicated customer support available for repairs and maintenance needs.

7.1 Warranty Coverage and Duration

The Drive Cruiser 3 Wheelchair is covered by a lifetime warranty for the original purchaser‚ ensuring protection against defects in materials and workmanship. This comprehensive coverage provides peace of mind‚ with support available for repairs and replacements‚ excluding normal wear and tear or misuse. Warranty details can be found in the user manual.

7.2 Contacting Customer Support

For assistance with the Drive Cruiser 3‚ visit the official Drive Medical website or refer to the user manual for contact details. Customer support is available to address inquiries‚ provide troubleshooting guidance‚ and assist with warranty claims or repair requests‚ ensuring optimal user experience and resolving issues promptly.

7.3 Repair and Replacement Options

Drive Medical offers repair and replacement options for the Cruiser 3. Under warranty‚ defective parts can be replaced free of charge. Contact customer support for authorization and guidance. Refer to the user manual or parts diagram for details on repairing or replacing components‚ ensuring compliance with manufacturer instructions for optimal functionality.

Customization and Accessories

The Drive Cruiser 3 wheelchair offers customizable options‚ including adjustable seat depth and upholstery‚ to meet individual needs. Accessories like additional padding or storage solutions are also available.

8.1 Available Accessories for the Cruiser 3

The Drive Cruiser 3 wheelchair offers a range of accessories to enhance user experience. These include adjustable armrests‚ footrests‚ and storage solutions like bags or trays. Additional options such as seat cushions‚ backrest extensions‚ and anti-tippers are available to customize the chair for individual needs‚ ensuring maximum comfort and convenience.

  • Adjustable armrests and footrests for optimal support.
  • Storage solutions like bags or trays for personal items.
  • Seat cushions and backrest extensions for added comfort.
  • Anti-tippers for improved stability and safety.

8.2 Customizing the Chair for User Needs

The Drive Cruiser 3 wheelchair can be tailored to meet individual preferences and requirements. Adjustments include seat depth‚ backrest angle‚ and footrest height to ensure optimal comfort. Additional extensions and accessories can be installed to enhance support and functionality‚ making the chair adaptable to various user needs and lifestyles.

  • Adjustable seat depth and backrest for personalized comfort.
  • Customizable footrest height to accommodate different user sizes.
  • Optional extensions for enhanced support and functionality.

8.3 Upgrading or Replacing Parts

Upgrading or replacing parts on the Drive Cruiser 3 is straightforward. Users can enhance functionality by installing new components like armrests or footrests. Genuine parts are available for purchase‚ ensuring compatibility and durability. Refer to the owner’s manual or parts diagram for detailed instructions and specifications.

  • Armrests and footrests can be upgraded for improved comfort.
  • Genuine parts are recommended for optimal performance.
  • Consult the manual or parts diagram for installation guidance.

Transportation and Storage

The Drive Cruiser 3 can be easily folded for transportation. Always secure it in a vehicle and store in a dry‚ clean environment to maintain durability.

9.1 Transporting the Wheelchair in a Vehicle

The Drive Cruiser 3 can be easily transported in a vehicle by folding it securely. Use straps or a carrier to prevent shifting and protect from dust. Always ensure the chair is properly secured to avoid damage during transit.

9.2 Storing the Wheelchair Properly

Store the Drive Cruiser 3 in a clean‚ dry‚ and cool environment. Fold the chair and cover it to protect from dust and moisture. Ensure the storage area is flat and secure to prevent tipping. Regularly inspect the chair for wear and tear before and after storage.

9.3 Travel Tips for Users

When traveling with the Drive Cruiser 3‚ ensure the chair is securely folded and restrained in vehicles. Always carry essential tools and a spare tire. Check for airline or transportation guidelines to ensure smooth transit. Plan routes with accessible paths and keep emergency contacts handy for assistance.

Compliance and Regulatory Information

The Drive Cruiser 3 meets rigorous safety standards and is FDA compliant. Built with environmentally friendly materials‚ it adheres to disposal guidelines‚ ensuring eco-conscious use.

10.1 Meeting Safety Standards

The Drive Cruiser 3 Wheelchair is designed to meet rigorous safety standards‚ ensuring stability and durability. It complies with FDA regulations and industry guidelines‚ providing users with a reliable and secure mobility solution while maintaining high-quality performance and safety.

10.2 Compliance with Medical Regulations

The Drive Cruiser 3 Wheelchair adheres to strict medical regulations‚ ensuring compliance with FDA guidelines and industry standards. It is designed and manufactured to meet high-quality benchmarks‚ providing users with a safe and reliable mobility solution that aligns with healthcare requirements and standards.

10.3 Environmental and Disposal Guidelines

The Drive Cruiser 3 Wheelchair is designed with environmental responsibility in mind. Proper disposal involves recycling recyclable materials and safely handling hazardous components like batteries. Always follow local regulations for medical device disposal to minimize environmental impact and ensure compliance with eco-friendly practices.

User Manual and Additional Resources

The user manual for the Drive Cruiser 3 Wheelchair is available for download as a PDF‚ providing detailed instructions for setup‚ operation‚ and maintenance. Additional resources include online tutorials‚ parts diagrams‚ and technical support for optimal use.

11.1 Downloading the PDF Manual

The Drive Cruiser 3 Wheelchair user manual is available as a PDF download from authorized sources like SpartanChem and archive.org. It provides comprehensive instructions for setup‚ operation‚ and maintenance‚ ensuring optimal use. The manual also includes troubleshooting guides and warranty information for user convenience.

11.2 Accessing Online Tutorials and Guides

Online tutorials and guides for the Drive Cruiser 3 Wheelchair are available on platforms like Helpjuice and ManualsLib. These resources provide step-by-step instructions for assembly‚ maintenance‚ and troubleshooting. Users can also find video guides and interactive demos to enhance their understanding of the wheelchair’s features and operation.

11.3 Finding Parts Diagrams and Technical Support

Parts diagrams and technical support for the Drive Cruiser 3 Wheelchair are available on the official Drive Medical website or platforms like ManualsLib. Users can access detailed diagrams‚ repair guides‚ and contact customer support for assistance with troubleshooting or maintenance.

Final Tips for Optimal Use

Regular maintenance‚ proper adjustment‚ and adhering to safety guidelines ensure longevity and comfort. Maximize efficiency by customizing settings and staying informed about updates and features.

12.1 Maximizing Comfort and Efficiency

Adjust the seat depth and backrest to fit your body perfectly‚ ensuring proper posture and support. Regularly check and maintain the wheelchair’s moving parts to optimize performance and extend its lifespan‚ while adhering to safety guidelines for a smooth and secure experience.

12.2 Regularly Updating Knowledge on Chair Features

Stay informed about the latest features and updates by reviewing the user manual and manufacturer guidelines. Familiarize yourself with customization options and maintenance tips to optimize performance and safety; Regular updates ensure you maximize the chair’s potential and enjoy a smoother‚ more efficient experience.

12.3 Ensuring Long-Term Durability

Regular cleaning‚ lubrication‚ and inspection of moving parts are essential for maintaining the wheelchair’s durability. Proper storage and adherence to weight limits also extend its lifespan. Follow the user manual guidelines to ensure the chair remains in optimal condition for years of reliable use.

moccamaster manual

The Moccamaster is a premium coffee maker known for its manual-adjust stop, copper boiling element, and handmade construction, ensuring optimal flavor and durability for coffee enthusiasts.

1.1 Overview of the Moccamaster Coffee Maker

The Moccamaster is a high-end coffee maker renowned for its manual-adjust stop, copper boiling element, and fast brewing time of 4-6 minutes. Handmade in the Netherlands, it combines sleek design with durability. The machine is designed to extract maximum flavor, emphasizing the importance of using quality beans. With a thermal carafe, it maintains coffee temperature and is easy to operate. Its unique features make it a top choice for coffee enthusiasts, offering a balance between functionality, design, and superior coffee quality.

1.2 Importance of the Manual in Using the Moccamaster

The manual is essential for understanding the Moccamaster’s operation, maintenance, and troubleshooting. It provides detailed instructions on using features like the manual-adjust stop and copper boiling element; Regular maintenance, such as cleaning and descaling, is outlined to ensure optimal performance. The manual also covers warranty information and repair options. By following the guide, users can maximize their coffee experience, troubleshoot common issues, and maintain the machine’s longevity. It serves as a comprehensive resource for both new and experienced users.

Key Features of the Moccamaster

The Moccamaster features a manual-adjust stop, copper boiling element, and fast brewing time. Its handmade construction and sleek design ensure durability and optimal performance, appealing to coffee enthusiasts.

2.1 Manual-Adjust Stop on the Brew Basket

The Moccamaster’s manual-adjust stop offers precise control over brewing speed. This feature allows users to pause or stop the flow of coffee into the carafe, ensuring customizable extraction times. It enhances flexibility, enabling users to adjust the brewing process according to their preferences for strength and flavor. This functionality is particularly beneficial for those who value tailored brewing experiences, making it a standout feature among coffee makers. The manual-adjust stop is easy to use and adds versatility to the brewing process.

2.2 Copper Boiling Element for Optimal Temperature Control

The Moccamaster features a copper boiling element that rapidly heats water to the ideal temperature for brewing coffee. This element ensures consistent and precise temperature control, which is crucial for extracting the best flavor from coffee grounds. The copper material is known for its excellent heat conductivity, allowing the machine to maintain optimal temperatures throughout the brewing process. This feature contributes to the Moccamaster’s ability to deliver a full-bodied and flavorful cup of coffee every time, making it a reliable choice for coffee enthusiasts.

2.3 Fast Brewing Time (4-6 Minutes)

The Moccamaster brews a full carafe of coffee in just 4 to 6 minutes, offering a quick yet high-quality coffee experience. Its efficient design ensures that every cup is rich and flavorful without sacrificing speed. This rapid brewing time makes it ideal for busy households while maintaining the perfect balance of extraction and temperature. The Moccamaster’s ability to deliver a freshly brewed pot in minutes is a testament to its innovative engineering and commitment to providing a superior coffee-making experience for users.

The Brewing Process

The Moccamaster’s brewing process combines precise temperature control, manual-adjustable flow, and rapid heating to ensure maximum flavor extraction, delivering a perfect cup every time efficiently.

3.1 How the Moccamaster Extracts Maximum Flavor

The Moccamaster extracts maximum flavor through precise temperature control, using a copper boiling element to heat water rapidly and maintain optimal brewing temperatures. The manual-adjust stop on the brew basket allows users to control the flow, ensuring even saturation of coffee grounds and preventing over-extraction. This combination of temperature control and flow management, along with a fast 4-6 minute brewing process, ensures that the coffee’s full flavor potential is realized, delivering a consistently excellent cup every time.

3.2 The Role of Water Temperature in Brewing

Water temperature plays a crucial role in brewing with the Moccamaster, as it directly impacts the extraction of coffee flavors. The machine’s copper boiling element ensures water reaches the ideal temperature range of 195°F to 205°F, essential for optimal extraction. Proper temperature control prevents under-extraction, which can result in a sour taste, or over-extraction, leading to bitterness. By maintaining precise heat, the Moccamaster consistently delivers a balanced and flavorful cup, highlighting the importance of temperature in achieving the perfect brew.

Design and Build Quality

The Moccamaster’s handmade construction and individual testing ensure exceptional quality. Its sleek, durable design combines functionality with elegance, reflecting a commitment to excellence in every detail.

4.1 Handmade Construction and Individual Testing

Each Moccamaster is crafted by hand, ensuring meticulous attention to detail and premium quality. Every machine undergoes rigorous individual testing to guarantee flawless performance. This handmade process, combined with thorough testing, results in a durable and reliable coffee maker that consistently delivers exceptional brewing results. The commitment to craftsmanship reflects in the machine’s longevity and ability to produce high-quality coffee with every use;

4.2 Sleek and Durable Design

The Moccamaster boasts a sleek and durable design that combines timeless elegance with modern functionality. Crafted from high-quality materials, its sturdy construction ensures long-lasting performance. The machine’s compact and attractive appearance complements any kitchen decor, while its robust build withstands daily use. The design emphasizes ease of use and cleaning, making it a practical choice for coffee lovers. Its aesthetic appeal and durability make it a worthwhile investment for those seeking a reliable and visually appealing coffee maker.

Maintenance and Care

Regular cleaning and descaling are essential for maintaining your Moccamaster. Follow the manual’s instructions to ensure optimal performance and longevity of the machine.

5.1 Cleaning and Descaling the Machine

Regular cleaning and descaling are crucial for maintaining your Moccamaster’s performance. Descale every 3-6 months using a solution recommended in the manual. Run the solution through the machine, then rinse thoroughly with fresh water to remove any residue. Clean the brew basket and carafe regularly to prevent buildup. For best results, follow the manual’s specific instructions to ensure optimal functionality and flavor extraction. Proper maintenance ensures your Moccamaster continues to deliver exceptional coffee for years to come.

5.2 Regular Maintenance for Optimal Performance

Regular maintenance ensures your Moccamaster operates at its best. Check and replace worn-out parts, such as the water filter or O-rings, as needed. Ensure the machine is placed on a stable, level surface to maintain even extraction. Refer to the manual for specific maintenance intervals and guidelines. Keeping the Moccamaster clean and well-maintained prevents clogs and ensures consistent brewing quality. Routine checks and timely replacements will extend the lifespan of your machine and preserve its performance over time.

Troubleshooting Common Issues

The Moccamaster may face issues like inconsistent brewing speed or temperature fluctuations. The manual provides troubleshooting solutions to address these problems, ensuring optimal performance.

6.1 Addressing Brewing Speed and Stop Function

If the Moccamaster’s brewing speed is inconsistent, check the manual-adjust stop on the brew basket. Ensure it’s clean and not clogged, as debris can slow flow. For the stop function, verify proper alignment with the carafe. If issues persist, refer to the manual for adjustment guidance or contact support. Regular cleaning and maintenance can prevent such problems, ensuring smooth operation and optimal coffee quality.

6.2 Solving Temperature-Related Problems

If your Moccamaster isn’t reaching optimal temperature, check the copper boiling element. Ensure it’s clean and free from scale buildup. Descale regularly, especially in hard water areas, to maintain performance; If the issue persists, consult the manual for troubleshooting steps or contact customer support. Proper maintenance ensures consistent heat, crucial for extracting maximum flavor from your coffee grounds.

Frequently Asked Questions (FAQs)

Common questions include maintenance tips, comparing models like KBGV Select vs. Manual, and warranty details, ensuring users optimize their Moccamaster experience.

7.1 Warranty and Repair Information

The Moccamaster typically comes with a 5-year warranty, covering defects in materials and workmanship. Repairs can be arranged through authorized service centers or by contacting customer support. Users are advised to refer to the manual or official website for detailed warranty terms and repair procedures. Proper maintenance, such as regular cleaning and descaling, is essential to ensure warranty coverage and optimal performance. For specific inquiries, the FAQ section provides comprehensive guidance on troubleshooting and repair options.

7.2 Comparing Moccamaster Models (e.g., KBGV Select vs. Manual Models)

The KBGV Select and Manual Models differ in features and price. The KBGV Select, priced at $350, offers a 1.25L capacity, thermal carafe, and programmable brewing. Manual Models, like the $190 glass carafe version, are more affordable and suited for smaller households. Both ensure quality brewing, but the Select adds convenience for those needing larger batches or advanced controls. Users should choose based on their brewing needs and budget, as both models deliver exceptional flavor and durability.

User Reviews and Feedback

Users praise the Moccamaster for its exceptional build quality, consistent flavor, and ease of use, with many highlighting its durability and quiet operation as standout features.

8.1 Positive Aspects of the Moccamaster

Users consistently highlight the Moccamaster’s durability, ease of use, and superior coffee quality. Many appreciate its quiet operation, fast brewing time, and manual-adjust stop feature. The machine’s handmade construction and sleek design are also frequently praised. Owners often mention that it delivers consistent results and is worth the investment for long-term use. Positive feedback also includes its ability to extracted maximum flavor from coffee beans, making it a favorite among coffee enthusiasts. Overall, users find it reliable and a great addition to their daily coffee routine.

8.2 Common User Tips for Better Coffee

Users recommend using high-quality coffee beans and adjusting the grind size for optimal extraction. The manual-adjust stop feature allows customization of brewing speed, enhancing flavor control. Regular cleaning and descaling are emphasized to maintain performance. Many suggest experimenting with coffee-to-water ratios for personalized taste. Proper preheating of the carafe and ensuring fresh water are also highlighted. These tips, combined with the machine’s features, help users achieve consistently great-tasting coffee and maximize their Moccamaster experience.

The Moccamaster is a standout coffee maker, offering manual control, precise temperature, and rapid brewing. Its handmade quality ensures durability, making it a worthwhile investment for coffee enthusiasts seeking exceptional flavor and convenience.

9.1 Final Thoughts on the Moccamaster Manual

The Moccamaster manual provides clear guidance for optimal use, emphasizing manual control and precise temperature. Its handmade construction ensures durability and superior performance. While it excels as a filter coffee machine, it may lack versatility for advanced users. However, its ease of use and ability to extract maximum flavor make it a top choice for coffee enthusiasts. By following the manual’s instructions, users can unlock the full potential of this premium coffee maker, balancing functionality and design for a perfect brewing experience.

9.2 Encouragement to Explore More Features

Exploring the Moccamaster’s features opens up a world of brewing possibilities. From the manual-adjust stop to the copper boiling element, each component is designed to enhance your coffee experience. Experiment with different settings to find your perfect cup. Dive into the FAQs for tips on maintenance and troubleshooting. By mastering these features, you can unlock the full potential of your Moccamaster, ensuring every brew is tailored to your taste preferences. With its sleek design and durable construction, this coffee maker is a long-term investment in your daily coffee ritual.

nanoblock instructions

Nanoblock instructions are essential for creating intricate models with precision and detail. They provide step-by-step guidance, ensuring a smooth and enjoyable building experience for enthusiasts of all skill levels.

Why Nanoblock Instructions Are Essential

Nanoblock instructions are crucial for achieving precise and detailed results. They provide a clear, step-by-step guide, ensuring that even the tiniest bricks are placed correctly. Without these instructions, builders may struggle with misplacements or incomplete models. The instructions act as a roadmap, breaking down complex designs into manageable steps. They cater to all skill levels, making the building process accessible and enjoyable. By following the instructions, builders can avoid frustration and ensure a successful outcome. Whether you’re a novice or an experienced enthusiast, Nanoblock instructions are indispensable for creating stunning and intricate models with ease and confidence.

Understanding the Importance of Step-by-Step Guidance

Step-by-step guidance in Nanoblock instructions is vital for ensuring accuracy and reducing errors. Each phase is meticulously detailed, allowing builders to follow a logical progression. This structured approach minimizes confusion, especially for complex models. The instructions often include visual cues and color-coded components, enhancing clarity. By breaking down the assembly process into manageable parts, builders can focus on one step at a time, maintaining organization and precision. This methodical guidance fosters confidence and skill development, making it easier to tackle intricate designs. Ultimately, step-by-step instructions empower builders to achieve professional-quality results, transforming individual bricks into breathtaking miniature masterpieces with patience and dedication.

Types of Nanoblock Instructions

Nanoblock instructions come in traditional paper booklets and digital formats, offering clear step-by-step guides with enhanced visual cues for a smooth building experience.

Traditional Paper Booklets

Traditional paper booklets are the most common form of Nanoblock instructions, typically included within each set. These booklets provide a straightforward, step-by-step guide to assembling intricate models. They feature clear diagrams, often with numbered sequences, to help builders navigate the process effortlessly. Color-coded representations of bricks are frequently used to enhance clarity, making it easier to identify the correct pieces for each step. The tactile nature of paper booklets allows for easy referencing while building, and their visual cues cater to builders of all skill levels. This format remains popular for its simplicity and effectiveness in guiding users through complex builds, ensuring a satisfying and precise construction experience.

Digital and Interactive Formats

Digital and interactive formats of Nanoblock instructions offer a modern and engaging way to build intricate models. Available on websites and apps, these formats often include zoomable diagrams, 3D views, and animated step-by-step guides. They allow builders to rotate models and access additional tips, enhancing the learning experience. Some platforms provide downloadable PDFs, combining the convenience of digital access with the familiarity of traditional booklets. Interactive tools cater to visual learners, making complex builds more accessible. Websites like BlockGuide and dedicated YouTube channels supplement these resources, offering tutorials and community insights. This digital evolution ensures builders can choose the format that best suits their preferences, optimizing their Nanoblock experience for efficiency and enjoyment.

Reading Nanoblock Instructions Effectively

Reading Nanoblock instructions requires patience and attention to detail. Use color-coding, good lighting, and organize your workspace to ensure accuracy and a seamless building experience.

Top Tips for Maximizing Understanding

  • Take your time to carefully review each step in the instructions to avoid misinterpretations.
  • Utilize the color-coding system to quickly identify the correct bricks for each step.
  • Use a magnifying glass or good lighting to see small details clearly.
  • Organize your workspace with a building mat or tray to keep bricks sorted.
  • Break down complex builds into smaller, manageable sections.
  • Refer to online communities or forums for additional tips and solutions.

By following these strategies, you can navigate Nanoblock instructions with confidence and enjoy a smooth, rewarding building experience.

Utilizing Color-Coding and Visual Cues

Nanoblock instructions often employ color-coding and visual cues to enhance clarity and simplify the building process. Color-coded bricks help users quickly identify the correct pieces for each step, reducing confusion and saving time. Visual cues, such as arrows and symbols, provide clear guidance on brick placement, orientation, and alignment. These features are particularly helpful for intricate models, where precision is key. By leveraging these tools, builders can follow instructions more efficiently, ensuring accuracy and reducing the likelihood of errors. This visual approach makes the instructions accessible to builders of all skill levels, fostering a more enjoyable and rewarding experience.

Organizing Your Workspace for Success

A well-organized workspace is crucial for a smooth Nanoblock building experience. Start by clearing a flat, stable surface and using a building mat or tray to keep bricks tidy. Sort bricks by color or shape to quickly locate specific pieces. This saves time and reduces frustration. Consider using small containers or compartments to separate bricks, especially for large sets. A magnifying glass or good lighting can enhance visibility, while tweezers help handle tiny pieces. Keeping your workspace organized ensures you can focus on the instructions without distractions. A clutter-free environment promotes efficiency and enjoyment, making the building process more rewarding and stress-free.

Troubleshooting Common Issues

Common issues when building with Nanoblock instructions often involve misaligned bricks or unclear steps. Patience and persistence are key; re-examining instructions or using magnifying tools can help resolve challenges effectively.

Strategies for Overcoming Challenges

When facing difficulties with Nanoblock instructions, several strategies can help. First, carefully re-examine the instructions to ensure accuracy. Using a magnifying glass or good lighting can enhance visibility, especially for small details. Breaking complex builds into smaller sections can make the process more manageable. Consulting online forums or dedicated Nanoblock communities often provides solutions from experienced builders. Taking a break and revisiting the instructions with a fresh perspective can also clarify confusing steps. Additionally, organizing bricks and using a building mat can reduce frustration. Patience and persistence are key, as these strategies help overcome challenges and achieve a successful build.

Using Tools for Better Visibility

Enhancing visibility is crucial when working with Nanoblock instructions, especially due to the tiny size of the bricks. A magnifying glass or good lighting can significantly improve detail recognition, making it easier to follow instructions. Tweezers are another valuable tool, helping to handle small pieces with precision. For intricate designs, consider using a loupe or even a microscope for extreme detail. Additionally, organizing your workspace with a building mat or tray keeps bricks tidy and prevents loss. These tools not only aid in accuracy but also reduce frustration, ensuring a smoother and more enjoyable building experience. Investing in the right tools can elevate your Nanoblock crafting skills.

Breaking Down Complex Builds

Complex Nanoblock builds can be overwhelming, but breaking them into smaller sections simplifies the process. Start by identifying key components of the model and tackling one at a time. This approach helps maintain focus and reduces confusion. Use the instructions to guide each phase, ensuring accuracy and completion. Prioritize foundational pieces first, as they provide stability for subsequent layers. Taking breaks between sections allows for a fresh perspective, preventing errors. Managing intricate details incrementally fosters patience and mastery, ensuring a polished final product. This methodical strategy turns daunting projects into achievable tasks, making even the most elaborate Nanoblock creations manageable and rewarding.

Additional Resources for Nanoblock Enthusiasts

Explore online communities, dedicated websites, and YouTube channels for Nanoblock instructions, offering detailed guides, tips, and support to enhance your building experience and expand your creativity.

Online Communities and Forums

Online communities and forums are invaluable resources for Nanoblock enthusiasts, offering a space to share ideas, ask questions, and learn from fellow builders. Websites like blockguide.ch and Manuall.co.uk provide extensive libraries of instructions and user guides. Additionally, platforms like Reddit’s r/Nanoblocks and the Nanoblocks Wiki foster collaboration and knowledge-sharing among enthusiasts. These communities often feature detailed troubleshooting guides, tips, and tricks, as well as user-created content. By engaging with these forums, builders can gain insights, solve challenges, and enhance their Nanoblock experience. Whether you’re a beginner or an expert, these resources offer a supportive environment to grow your skills and connect with like-minded hobbyists.

Dedicated Websites and YouTube Channels

Dedicated websites like Block Guide and NanoBlock Instruction offer comprehensive collections of Nanoblock instructions, catering to both casual builders and avid enthusiasts. These platforms provide detailed step-by-step guides, high-quality images, and downloadable PDFs for offline use. Additionally, YouTube channels such as NanoBlock Instructions Channel and Christopher Tan Designs offer video tutorials, making complex builds more accessible. These visual guides are particularly helpful for understanding intricate steps, offering a dynamic and immersive learning experience. By leveraging these resources, builders can enhance their skills and confidently tackle even the most challenging Nanoblock projects.

Nanoblock instructions are indispensable for creating intricate and detailed models, offering a rewarding experience for builders of all skill levels. They provide clear, step-by-step guidance, ensuring precision and enjoyment. Whether through traditional paper booklets or digital formats, these instructions cater to diverse preferences, enhancing the building process. The inclusion of visual cues, color-coding, and interactive tools further aids understanding. Online communities, dedicated websites, and YouTube channels offer additional support, fostering a sense of connection among enthusiasts. By following Nanoblock instructions, builders can unlock their creativity, achieve a sense of accomplishment, and bring their miniature masterpieces to life with ease and confidence.

my cloud ultra ex2 manual

The My Cloud EX2 Ultra manual introduces a high-performance NAS designed for home or small office storage needs, offering reliable storage, RAID capabilities, and robust backup solutions, along with media streaming and remote access features for enhanced convenience․

1․1 Overview of the My Cloud EX2 Ultra

The My Cloud EX2 Ultra is a two-bay NAS designed for home and small office use, offering up to 12TB of storage․ It features a Marvell Armada processor, dual HDD bays, and USB ports for expansion․ The device supports RAID configurations and provides a user-friendly dashboard for easy setup and management of files, backups, and media streaming․

1․2 Key Features of the My Cloud EX2 Ultra

The My Cloud EX2 Ultra offers RAID 0, RAID 1, and JBOD configurations for flexible storage management․ It supports cloud and LAN backups, media streaming, and remote access via the WD My Cloud app․ The device features a user-friendly dashboard, encryption for security, and expandable storage options․ It also supports third-party apps for enhanced functionality and customization․

System Requirements and Compatibility

The My Cloud EX2 Ultra requires a compatible router, Gigabit Ethernet connection, and supports Windows, macOS, and Linux operating systems for seamless integration into various networks․

2․1 Hardware Requirements for Setup

The My Cloud EX2 Ultra requires a compatible router, Gigabit Ethernet connection, and supports Windows, macOS, and Linux operating systems․ Ensure you have the necessary cables, power adapter, and check specifications for supported storage drives and USB peripherals to ensure optimal performance and compatibility․

2․2 Software Compatibility and Supported Operating Systems

The My Cloud EX2 Ultra supports Windows, macOS, and Linux operating systems․ It is compatible with the WD My Cloud mobile app for iOS and Android․ The device also works with various web browsers for remote access and management, ensuring seamless integration across multiple platforms and devices for efficient data management․

Installation and Setup

Install the My Cloud EX2 Ultra by connecting it to your network via Ethernet․ Use the setup wizard or mobile app for initial configuration and remote access․

3․1 Physical Installation of the My Cloud EX2 Ultra

Physically install the My Cloud EX2 Ultra by connecting it to your network using an Ethernet cable․ Place the device on a flat surface, ensuring proper ventilation․ Install the provided hard drives into the bays, securing them firmly․ Connect the power cable and turn it on․ The device will automatically initialize, ready for further setup via the dashboard or mobile app․

3․2 Initial Setup and Configuration

After physical installation, connect the My Cloud EX2 Ultra to your network using the provided Ethernet cable․ Access the dashboard via a web browser by typing the device’s IP address or using the WD Discovery software․ Create an admin account, set up RAID configuration, and configure network settings․ Optionally, enable remote access for cloud connectivity and download the WD My Cloud mobile app for remote management․

3․3 RAID Configuration Options (RAID 0, RAID 1, JBOD)

The My Cloud EX2 Ultra supports RAID 0 for maximum performance by combining disks, RAID 1 for redundancy by mirroring data, and JBOD for using disks of varying sizes․ Choose RAID 0 for speed, RAID 1 for backup reliability, or JBOD for flexibility․ Configure these settings during initial setup to optimize storage capacity, performance, and data protection based on your needs․

User Interface and Dashboard Navigation

The My Cloud EX2 Ultra features a user-friendly dashboard designed for easy navigation and customization․ Access key settings, monitor storage, and manage user accounts seamlessly through its intuitive interface․

4․1 Overview of the My Cloud EX2 Ultra Dashboard

The My Cloud EX2 Ultra dashboard provides a centralized interface for managing your NAS․ It allows users to create and manage user accounts, customize settings, and monitor storage․ The dashboard also offers quick access to media streaming, remote access configurations, and backup options, ensuring a seamless and intuitive experience for all users․

4․2 Navigating the Dashboard and Customizing Settings

The My Cloud EX2 Ultra dashboard offers an intuitive interface for easy navigation․ Users can customize settings such as user permissions, backup configurations, and media streaming options․ The dashboard also allows for personalized preferences, ensuring a tailored experience․ Navigating through tabs and menus streamlines access to key features, enhancing overall productivity and ease of use for both novice and advanced users․

Data Management and File Sharing

The My Cloud EX2 Ultra simplifies data management with intuitive file organization, robust backup options, and secure access control․ It enables efficient file sharing and ensures data integrity for both home and small office environments․

5․1 File and Folder Management on the My Cloud EX2 Ultra

The My Cloud EX2 Ultra offers intuitive file and folder management through its dashboard, enabling users to organize, access, and secure their data efficiently․ Features include shared folders, drag-and-drop uploads, and file versioning to streamline storage and retrieval․ Users can also set access permissions to ensure data privacy and control․

5․2 Backup Options (Cloud, LAN, and RAID 1)

The My Cloud EX2 Ultra provides comprehensive backup solutions, including RAID 1 for redundancy, cloud backups for offsite storage, and LAN-based backups for local network protection․ These options ensure data security and redundancy, safeguarding against hardware failure and data loss․ Users can easily configure these settings through the dashboard for reliable and efficient data protection․

5․3 Access Control and User Permissions

The My Cloud EX2 Ultra offers robust access control, enabling users to create accounts, set permissions, and manage access rights․ Secure file sharing is supported through password-protected links, ensuring data privacy․ Administrators can customize permissions for folders and files, granting read-only or full access to specific users or groups, enhancing security and collaboration․

Remote Access and Cloud Connectivity

Access your My Cloud EX2 Ultra remotely via the WD My Cloud mobile app or web interface, ensuring secure file management with AES encryption and easy setup․

6․1 Setting Up Remote Access to Your My Cloud EX2 Ultra

Setting up remote access to your My Cloud EX2 Ultra is straightforward․ Use the WD My Cloud mobile app or web interface to access your files securely․ Enable remote access via the dashboard, ensuring your data is protected with AES encryption․ This feature allows convenient file management and media streaming from anywhere, enhancing productivity and flexibility for users on the go․

6․2 Using the WD My Cloud Mobile App

The WD My Cloud mobile app allows seamless remote access to your My Cloud EX2 Ultra․ Install the app, log in with your WD My Cloud account, and manage files, stream media, or backup data directly from your smartphone․ Features include file uploads, media streaming, and secure access to your stored content, ensuring convenience and peace of mind while on the go․

Performance Optimization

Optimize your My Cloud EX2 Ultra by adjusting settings, managing backups, and ensuring proper network configuration to enhance file transfer speeds and overall system efficiency for smoother operation․

7․1 Tips for Maximizing Performance

Regularly update firmware, optimize RAID configurations, and disable unnecessary services․ Ensure stable network connections and use high-quality Ethernet cables․ Schedule backups during off-peak hours to minimize bandwidth usage․ Monitor disk health and replace failing drives promptly․ Enable jumbo frames and adjust MTU settings for improved data transfer speeds․ Use the WD My Cloud app for remote monitoring and performance insights․

7․2 Troubleshooting Common Performance Issues

Identify bottlenecks by checking network connectivity, disk usage, and CPU utilization․ Restart the device to resolve temporary glitches․ Ensure firmware is up-to-date, as outdated versions can hinder performance․ Check for over-saturated bandwidth and adjust backup schedules․ Verify RAID configuration is optimal for your workload․ Address slow transfer speeds by testing with a wired connection and high-quality cables․

Security Features and Data Protection

The My Cloud EX2 Ultra offers robust security features, including encryption, firewall settings, and user authentication․ Ensure data protection with strong passwords and regular firmware updates․

8․1 Encryption and Data Security Measures

The My Cloud EX2 Ultra provides robust encryption for data protection, ensuring files are secure․ It supports AES encryption for data at rest and during transmission․ Users can enable encryption for added privacy, protecting sensitive information from unauthorized access․ The system also offers secure remote access and encryption key management, giving users full control over their data security settings through the dashboard․

8․2 Firewall Settings and Network Security

The My Cloud EX2 Ultra offers advanced firewall settings to protect your network from unauthorized access․ Configure customizable firewall rules to enhance security․ Enable secure remote access with built-in VPN support and SSL encryption․ The device also supports IP blocking and port forwarding for additional network protection, ensuring your data remains safe from external threats and vulnerabilities․

8․3 User Authentication and Password Protection

To enhance security on the My Cloud EX2 Ultra, configure strong user authentication and password protection․ Create user accounts with complex passwords, assign specific permissions, and enable two-factor authentication for added security․ Set account lockout policies after failed attempts and schedule regular password updates․ Manage user access efficiently by deactivating unused accounts and ensuring only authorized access to sensitive data․

Advanced Features and Customization

The My Cloud EX2 Ultra offers advanced media streaming, app management, and customization options, allowing users to enhance functionality and tailor their storage experience․

9․1 Media Streaming and Entertainment Features

The My Cloud EX2 Ultra supports seamless media streaming, enabling users to stream large files to any screen․ It includes a media server for organizing and streaming videos, photos, and music․ Compatible with popular entertainment devices, it ensures high-quality playback and integrates with apps for remote access, enhancing your multimedia experience․

9․2 Installing and Managing Third-Party Apps

Expand your My Cloud EX2 Ultra’s functionality by installing third-party apps from the WD Apps store․ Access the app section via the dashboard, download, and install apps to enhance productivity, media, or security․ Each app offers unique features, and installation is straightforward with on-screen instructions․ Manage apps by enabling, disabling, or updating them to maintain optimal performance and security․

Troubleshooting and Support

Resolve common issues using the troubleshooting guide in the manual or contact WD Support for assistance․ Access online resources, FAQs, and customer service for help․

10․1 Common Issues and Solutions

Address issues like connectivity problems, slow performance, or backup failures by checking network settings, updating firmware, and ensuring proper RAID configuration․ Refer to the manual for step-by-step solutions or contact WD Support for advanced troubleshooting․ Online resources and FAQs also provide guidance for resolving common challenges effectively․

10․2 Contacting WD Support and Online Resources

For assistance, visit the WD Support website, which offers manuals, installation guides, and FAQs․ Contact support via email, phone, or live chat for personalized help․ Additionally, register your product online to access exclusive updates and ensure eligibility for support services․ Utilize online forums and resources for troubleshooting and optimizing your My Cloud EX2 Ultra experience․

FAQs and User Feedback

Frequently Asked Questions address common setup, backup, and performance issues․ User feedback highlights the My Cloud EX2 Ultra’s reliability, intuitive interface, and robust storage capabilities․

11․1 Frequently Asked Questions

Common queries include setup steps, backup options, and performance optimization․ Users often ask about RAID configurations, remote access, and password protection․ The manual addresses these topics, ensuring smooth operation and troubleshooting․ Additionally, questions about compatible operating systems and app installations are frequently covered, providing comprehensive support for users․

11․2 User Reviews and Feedback on the My Cloud EX2 Ultra

Users praise the My Cloud EX2 Ultra for its robust storage capacity and intuitive dashboard․ Positive feedback highlights reliable backups and seamless media streaming․ Some users note setup complexity for beginners, while others appreciate its scalability and remote access features․ Overall, it’s well-regarded for balancing performance and affordability for home and small office needs․

The My Cloud EX2 Ultra is a reliable, versatile NAS solution offering robust storage, media streaming, and remote access․ Its scalability and performance make it ideal for home and small office use, ensuring secure and efficient data management․

12․1 Summary of Key Benefits and Features

The My Cloud EX2 Ultra offers high-performance storage, RAID options, and robust backup solutions․ It supports media streaming, remote access, and third-party apps, providing versatile functionality․ With an intuitive dashboard, it ensures secure and efficient data management, making it an ideal solution for home and small office needs․

12․2 Final Tips for Getting the Most Out of Your My Cloud EX2 Ultra

Regularly update firmware for optimal performance and security․ Use RAID configurations for redundancy or speed․ Schedule backups to protect your data․ Explore third-party apps to enhance functionality․ Organize files and folders for easy access․ Utilize remote access for convenience․ Monitor storage capacity and adjust settings as needed for maximum efficiency․

instruct the ignorant

Instructing the ignorant requires empathy, patience, and a clear understanding of their knowledge gaps․ Education bridges ignorance, fostering awareness and critical thinking․ Empowering others through knowledge enriches society․

1․1 Understanding the Concept of Ignorance

Ignorance refers to a lack of knowledge, information, or understanding about a particular topic or subject․ It is a natural state that arises from limited exposure, education, or cultural barriers․ Ignorance can manifest in various forms, such as misinformation, unawareness of facts, or a misunderstanding of concepts․ Recognizing ignorance is the first step toward addressing it, as it allows individuals to seek knowledge and clarification․ Overcoming ignorance requires empathy, education, and a willingness to learn, ensuring that individuals can grow intellectually and socially․

1․2 The Importance of Education in Addressing Ignorance

Education is a powerful tool for combating ignorance, as it provides individuals with the knowledge and skills needed to understand the world․ Through structured learning, education dismantles misinformation and fosters critical thinking․ It equips people with the ability to question assumptions and seek truth, thereby reducing the prevalence of ignorance․ By promoting literacy, numeracy, and cultural awareness, education empowers individuals to make informed decisions, contributing to personal and societal progress․ Thus, education serves as the cornerstone in the fight against ignorance, enabling individuals to navigate complex realities effectively․

The Psychology of Ignorance

Ignorance stems from cognitive biases and limited knowledge, often reinforced by overconfidence․ Psychological factors like the Dunning-Kruger effect highlight how unaware individuals may overestimate their understanding, hindering growth․

2․1 Cognitive Biases and Their Role in Perpetuating Ignorance

Cognitive biases, such as confirmation bias and the Dunning-Kruger effect, significantly contribute to ignorance․ These biases distort perception, leading individuals to overlook evidence and cling to misconceptions․ Confirmation bias, for instance, makes people favor information that aligns with their beliefs, while the Dunning-Kruger effect causes overconfidence in inaccurate knowledge․ These mental shortcuts prevent the acceptance of new information, reinforcing ignorance․ Addressing these biases requires awareness and critical thinking, enabling individuals to question their assumptions and seek truth․

2․2 The Dunning-Kruger Effect: When Ignorance Meets Confidence

The Dunning-Kruger effect occurs when individuals with limited knowledge or skills overestimate their competence․ This cognitive bias creates a dangerous mix of ignorance and confidence, leading people to make poor decisions despite their lack of understanding․ It often stems from metacognitive deficits, where individuals cannot objectively assess their own abilities․ This phenomenon highlights the challenge of addressing ignorance, as those affected are unaware of their knowledge gaps․ Recognizing this effect is crucial for fostering humility and a willingness to learn, which are essential for overcoming ignorance and fostering intellectual growth․

Effective Strategies for Instructing the Ignorant

Effective instruction requires patience, empathy, and clear communication․ Using analogies and relatable examples simplifies complex concepts, fostering understanding and engagement in learners․

3․1 Patience and Empathy in the Learning Process

Patience and empathy are crucial when instructing the ignorant․ Recognizing knowledge gaps without judgment fosters a safe learning environment․ Empathy builds trust, encouraging learners to ask questions and seek clarification․ Patience allows educators to break down complex ideas into digestible parts, ensuring understanding․ By combining these qualities, educators create a supportive atmosphere where learners feel comfortable admitting ignorance and actively participate in their own education․ This approach not only enhances learning but also empowers individuals to embrace lifelong knowledge acquisition․

3․2 Using Analogies and Relatable Examples to Simplify Complex Concepts

Using analogies and relatable examples is a powerful way to simplify complex concepts for the ignorant․ By bridging knowledge gaps with familiar scenarios, educators make abstract ideas more accessible․ For instance, explaining technical processes through everyday experiences, like comparing coding to cooking, helps learners visualize and understand․ Relatable examples reduce confusion and enhance engagement, making the learning process more effective․ This approach ensures that even intricate topics are presented in a digestible manner, fostering comprehension and retention․ It’s a key strategy for making education inclusive and impactful․

3․3 Encouraging Critical Thinking and Questioning

Encouraging critical thinking and questioning is essential when instructing the ignorant․ It fosters curiosity, analysis, and informed decision-making․ By promoting a culture where questions are valued, educators help learners move beyond mere memorization to deeper understanding․ This approach breaks down barriers of ignorance by empowering individuals to seek knowledge independently․ Open-ended discussions and real-world applications further enhance the ability to think critically, ensuring that learning is both meaningful and lasting․ Cultivating a safe environment for inquiry is key to unlocking intellectual growth and awareness․

The Role of Technology in Educating the Ignorant

Technology plays a pivotal role in educating the ignorant by providing accessible resources and tools․ It bridges knowledge gaps, enabling lifelong learning and fostering awareness globally․

4․1 Search Engines and Their Impact on Access to Information

Search engines have revolutionized access to information, enabling users to retrieve targeted results quickly․ They empower individuals to address knowledge gaps, fostering education and awareness․ By mastering search query syntax, users can refine results, enhancing learning efficiency․ However, challenges like information overload and misinformation persist, requiring critical thinking․ Search engines democratize knowledge, making it accessible globally and promoting lifelong learning․ They serve as essential tools in educating the ignorant, bridging gaps and empowering individuals to seek understanding․ Their impact is profound, reshaping how we acquire and utilize information in the digital age․

4․2 The Benefits and Limitations of Online Learning Platforms

Online learning platforms offer unprecedented access to education, breaking barriers of time and location․ They provide diverse courses, catering to various learning needs and styles․ However, limitations exist, such as the need for self-discipline and potential disparities in content quality․ Despite these challenges, platforms like Coursera and Khan Academy democratize education, enabling individuals to address ignorance proactively․ They empower learners to acquire new skills and knowledge, fostering personal growth and societal progress․ Balancing convenience with critical engagement is key to maximizing their educational potential and impact․

Real-World Examples of Successful Education

Historical literacy movements and modern digital education initiatives exemplify how targeted instruction reduces ignorance․ Their success demonstrates the transformative power of education in empowering individuals globally․

5․1 Historical Movements for Literacy and Education

Historical movements, such as the global push for universal literacy in the 19th and 20th centuries, illustrate the societal impact of educating the ignorant․ These movements, often led by governments and non-profits, emphasized access to education for all, regardless of class or gender․ For example, the establishment of public schools and compulsory education laws transformed societies by reducing ignorance and fostering economic growth․ These efforts laid the foundation for modern education systems, proving that targeted instruction can eradicate widespread ignorance and empower future generations․

5․2 Modern Initiatives for Global Education and Awareness

Modern initiatives like the United Nations’ Sustainable Development Goals and global campaigns for digital literacy are transforming education․ Organizations such as UNESCO and the Global Partnership for Education focus on eradicating ignorance by providing access to quality education worldwide․ Online platforms and mobile learning apps have also emerged, offering free or low-cost educational resources․ These efforts aim to bridge knowledge gaps, promote inclusivity, and empower individuals, ensuring that no one remains in ignorance due to lack of opportunities․ Technology plays a crucial role in these contemporary educational movements․

Addressing Misinformation and Disinformation

Addressing misinformation requires media literacy, fact-checking, and critical thinking․ Educating individuals to verify sources empowers them to combat ignorance and make informed decisions effectively online․

6․1 The Role of Media Literacy in Combating Ignorance

Media literacy equips individuals with the skills to critically analyze information, identify biases, and recognize misinformation․ By understanding how media operates, people can discern credible sources, enhancing their ability to make informed decisions․ This competence fosters a more informed society, reducing the spread of ignorance and promoting a culture of discernment and critical thinking in the digital age․ Educating individuals to navigate media effectively is essential for combating misinformation and fostering an informed populace․

6․2 Fact-Checking and Verification in the Digital Age

Fact-checking and verification are crucial tools for combating misinformation and ignorance․ In the digital age, where information spreads rapidly, verifying sources ensures accuracy and credibility․ Platforms and initiatives dedicated to fact-checking help identify false claims, fostering transparency and trust․ By encouraging individuals to question and verify information, society can reduce the spread of misinformation․ This practice promotes critical thinking and empowers people to make informed decisions, countering ignorance effectively in an increasingly complex information landscape․

The Importance of Lifelong Learning

Lifelong learning fosters personal growth and adaptability, enabling individuals to stay informed and overcome ignorance․ Embracing curiosity and continuous education empowers people to thrive in an evolving world․

7․1 Continuous Education as a Tool for Personal Growth

Continuous education is a powerful tool for personal growth, enabling individuals to stay informed and adaptable in a rapidly changing world․ It fosters empathy, critical thinking, and curiosity, helping people overcome ignorance and broaden their perspectives․ By embracing lifelong learning, individuals can acquire new skills, challenge assumptions, and develop a deeper understanding of the world․ This process not only enhances intellectual abilities but also builds confidence and resilience, encouraging individuals to confront and admit gaps in their knowledge․ Ultimately, continuous education empowers people to thrive and contribute meaningfully to society․

7․2 Overcoming the Fear of Asking Questions and Admitting Ignorance

Overcoming the fear of asking questions and admitting ignorance is crucial for personal growth and learning․ Many individuals hesitate to seek clarification due to fear of judgment or embarrassment․ However, acknowledging gaps in knowledge is the first step toward understanding․ Creating a supportive environment where questions are encouraged fosters curiosity and reduces stigma․ Admitting ignorance demonstrates humility and a willingness to learn, which are essential for intellectual development․ By embracing this mindset, individuals can break free from the constraints of unawareness and actively pursue knowledge with confidence and openness․