Rock and mineral identification is a fundamental skill for geologists and enthusiasts, offering insights into Earth’s history. By studying physical properties, optical characteristics, and geological processes, one can uncover the stories behind each specimen, fostering a deeper appreciation for nature’s creations.
Key Characteristics for Identification
Key characteristics include clarity, transparency, cleavage patterns, and specific gravity. These features, along with crystal form and optical properties, help distinguish minerals and rocks, aiding in accurate classification and identification.
Physical Properties
Physical properties are essential for identifying minerals and rocks. Clarity refers to how transparent or translucent a mineral is, ranging from clear to opaque. Color and luster are immediate identifiers, though color can vary and luster describes light reflection; Streak, the powder color on a porcelain plate, often differs from the mineral’s external color. Hardness, tested using Mohs’ scale, measures scratch resistance. Density, the mass per unit volume, helps distinguish similar minerals. Cleavage and fracture describe how minerals break, with cleavage following atomic patterns and fracture being irregular. These properties, along with others like specific gravity and magnetic susceptibility, form the foundation for accurate identification, guiding further analysis and classification.
Optical Properties
Optical properties reveal how minerals interact with light, aiding in identification. Transparency ranges from transparent to opaque, while color can vary under different lighting conditions. Pleochroism describes color changes when viewed from different angles, visible in minerals like tourmaline. Refractive index measures light bending, often used in microscopy. Birefringence occurs when light splits into two rays, causing double refraction in minerals like calcite. Extinction refers to how light behaves as it passes through a mineral, with patterns aiding identification. These properties, analyzed using polarizing microscopes, provide critical clues. They complement physical properties and are essential for distinguishing similar minerals. Understanding optical characteristics enhances accuracy in classification and identification, making them indispensable in geological studies and specimen analysis. By examining how light interacts with minerals, one can uncover their unique identities and gain insights into their composition.
Crystal Form
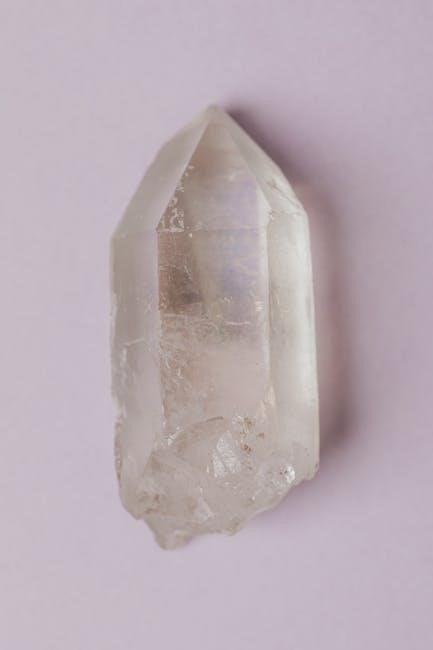
Crystal form refers to the geometric shape in which minerals naturally grow, dictated by their atomic structure. This characteristic is crucial for identification, as many minerals exhibit unique and consistent crystal patterns. For example, quartz often forms six-sided prisms, while pyrite is known for its cubic or octahedral crystals. The arrangement of atoms within a mineral determines its external shape, creating symmetrical forms that can be classified into crystal systems, such as isometric, tetragonal, or monoclinic. Observing crystal form often requires magnification, especially for small specimens. However, some minerals, like obsidian, lack visible crystals due to rapid cooling. Crystal form can also vary based on growth conditions, such as the presence of space or the availability of elements. By analyzing crystal form, geologists can narrow down potential mineral candidates and gain insights into their formation environments. This visual clue is a cornerstone of mineral identification, bridging the gap between macroscopic observation and microscopic analysis. It remains a vital tool for both professionals and enthusiasts in understanding Earth’s geological treasures.
Essential Tools and Resources
Identifying rocks and minerals requires a combination of tools and resources to ensure accuracy. A hand lens or magnifying glass is indispensable for examining textures and crystal structures. A streak plate helps determine the mineral’s streak color, while a hardness test kit assesses scratch resistance. Acid testing kits are useful for identifying carbonate minerals like calcite. A scale or balance measures specific gravity, and a magnet tests for magnetic properties. Field guides, such as the Smithsonian Handbooks: Rocks & Minerals, provide detailed descriptions and images for comparison. Online databases and apps, like those using color classification models, offer additional support. Geology labs often use advanced tools like XRF analysers for elemental composition or FTIR for molecular structure. For educators and students, rock and mineral kits with numbered samples simplify learning. These tools collectively enhance the identification process, making it accessible to both hobbyists and professionals. Leveraging these resources ensures a comprehensive understanding of geological specimens.
Understanding Geological Processes
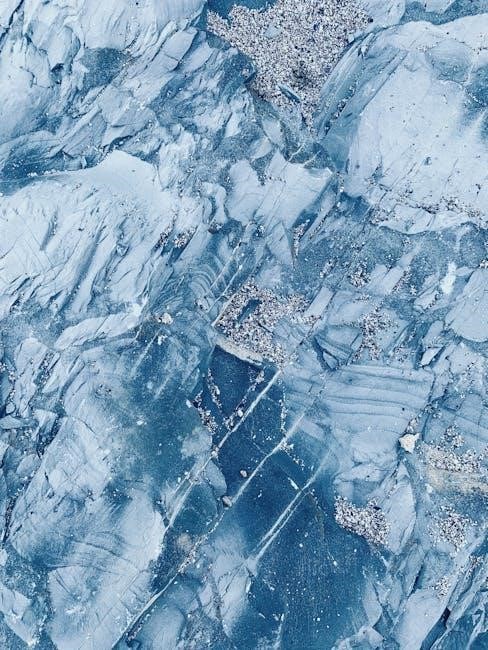
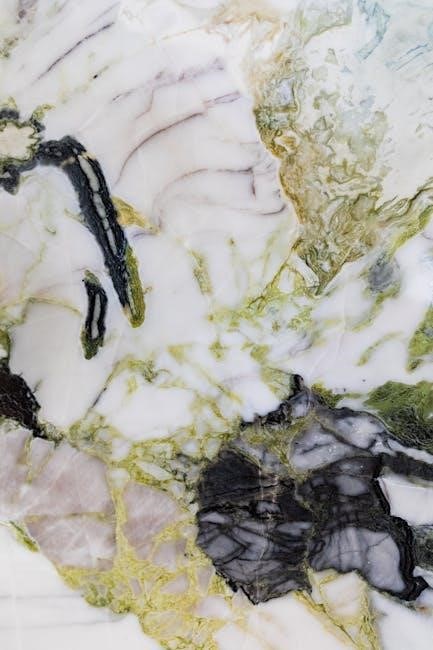
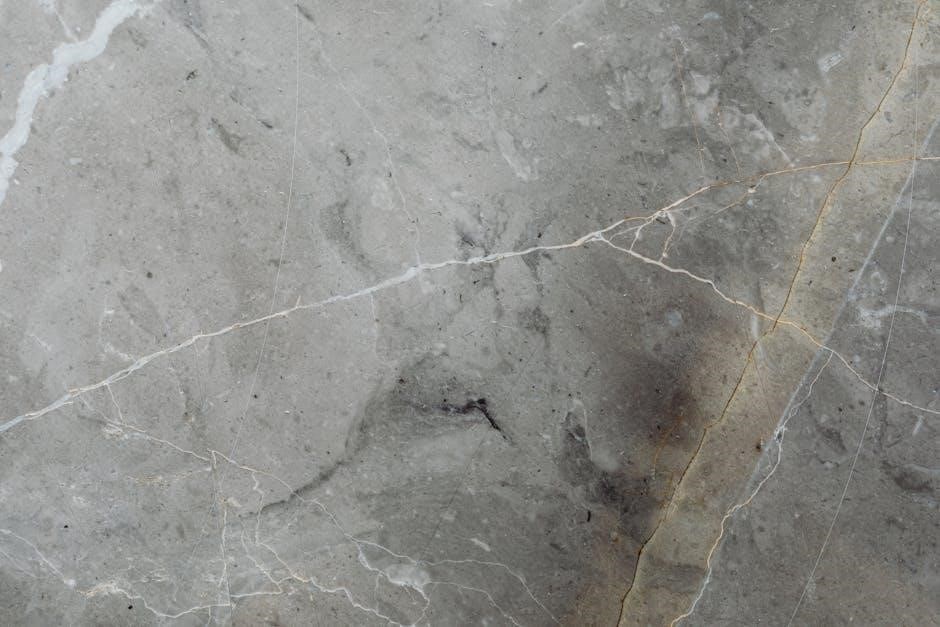
Geological processes are the foundation for understanding how rocks and minerals form and evolve. Igneous rocks originate from cooled magma or lava, capturing minerals like quartz and feldspar. Sedimentary rocks form through erosion and compression of organic and inorganic particles, often containing fossils. Metamorphic rocks emerge from high-pressure and temperature transformations, altering existing rocks into marble or slate. These processes shape Earth’s structure and influence mineral composition. Recognizing them aids in identifying specimens, as each process leave distinct traits. For example, igneous rocks may have glassy textures, while sedimentary ones show layered patterns. Studying these processes reveals Earth’s history, from ancient environments to tectonic shifts. This knowledge is vital for geologists, enabling accurate mapping and environmental assessments. By grasping geological processes, enthusiasts can better appreciate the stories behind their finds, whether shimmering quartz or sturdy granite. This understanding bridges the gap between observation and insight, enriching the study of rocks and minerals.
Common Rock Types
Rocks are broadly categorized into three primary types: igneous, sedimentary, and metamorphic. Igneous rocks form from cooled magma or lava, with examples like granite and basalt. Sedimentary rocks develop from compressed layers of organic and inorganic particles, such as sandstone and shale. Metamorphic rocks emerge from altered pre-existing rocks under high pressure and temperature, including marble and slate. Each type has unique textures and mineral compositions, shaped by distinct geological processes. For instance, igneous rocks may feature visible mineral crystals, while sedimentary rocks often display layered patterns. Understanding these categories is essential for identification, as they provide clues about a rock’s origin and history. By recognizing these common rock types, enthusiasts and geologists alike can better interpret Earth’s geological landscape and the stories embedded within each specimen. This classification forms the backbone of rock studies, aiding in further detailed analysis and appreciation of natural formations.
Common Mineral Species

Minerals are the building blocks of rocks, and their identification is crucial for understanding geological formations. Some of the most common mineral species include quartz, feldspar, mica, and amphibole. Quartz, known for its hexagonal crystals, is one of the most abundant minerals on Earth, found in igneous, sedimentary, and metamorphic rocks. Feldspar, another prevalent mineral, is a key component of igneous rocks like granite. Mica minerals, such as biotite and muscovite, are recognizable for their shiny, layered appearance. Amphibole minerals, like hornblende, are common in metamorphic and igneous rocks, often displaying a dark, fibrous texture. Other notable minerals include calcite, known for its rhombic crystals and presence in sedimentary rocks, and pyrite, or “fool’s gold,” which is prized for its metallic luster. Each mineral species has unique physical and optical properties, such as color, hardness, and cleavage, that aid in identification. By studying these minerals, enthusiasts and geologists can gain insights into Earth’s geological history and the processes that shaped our planet. This knowledge also enhances the appreciation of rocks and their compositions.
The Importance of Identification
The importance of rock and mineral identification extends beyond mere classification, serving as a gateway to understanding Earth’s history and geological processes. By identifying specimens, collectors and geologists can uncover insights into their formation, composition, and the environmental conditions under which they developed. This knowledge not only enhances the value of collections but also contributes to scientific research and education. Rock and mineral identification plays a critical role in geological surveys, aiding in the mapping of Earth’s crust and the discovery of natural resources. It also fosters a deeper appreciation for the natural world, inspiring curiosity and passion among enthusiasts. Furthermore, accurate identification is essential for environmental studies, helping to assess the impact of human activities on geological formations. Each identified specimen tells a unique story, shaped by millions of years of Earth’s evolution, making the practice of identification both scientifically valuable and personally rewarding. Through this process, we gain a better understanding of our planet and its intricate geological tapestry.
Step-by-Step Identification Guide
A systematic approach is essential for accurate rock and mineral identification. Begin by observing the specimen’s color, texture, and transparency. Note its luster, which can be metallic or non-metallic. Next, assess its hardness using tools like the Mohs scale. Conduct a streak test to determine the color of the mineral in powdered form. Measure density by comparing weight to volume, and examine cleavage patterns. Use a hand lens or microscope to study crystal forms. Chemical tests, such as acid reactions, can provide additional clues. Compare findings with reference guides or databases. For rocks, categorize them into igneous, sedimentary, or metamorphic types based on composition and structure. Consider the geological context of the specimen’s origin. Seek expert consultation if needed; Document observations thoroughly. By following these steps, enthusiasts can confidently identify rocks and minerals, enhancing their understanding of Earth’s geological wonders.