Larson Quick Fit Handle Set Installation Instructions: A Comprehensive Guide
This guide details the process of installing a Larson QuickFit handle set, covering removal of old hardware, preparation, and securing components for a smooth, functional door operation․
Understanding the Quick Fit Handle Set
The Larson Quick Fit Handle Set represents a significant advancement in storm door hardware, designed for simplified installation and enhanced user experience․ Unlike traditional handle sets requiring extensive adjustments and specialized tools, the Quick Fit system prioritizes ease of use without compromising security or durability․ This innovative design incorporates a streamlined mounting process, reducing installation time and minimizing potential complications․
Key to the Quick Fit’s functionality is its pre-aligned components and intuitive locking mechanism․ The set typically includes an exterior handle, an interior handle, a spindle, and mounting hardware, all engineered to work seamlessly together․ The system aims to address common frustrations associated with storm door handle replacements, such as misaligned parts and stripped screws, offering a more reliable and user-friendly solution for homeowners and installers alike․ It’s a quality door with a redesigned handle․
Benefits of the Quick Fit Design
The Larson Quick Fit Handle Set offers numerous advantages over conventional storm door handles․ Primarily, installation is significantly faster and easier, often requiring minimal tools and expertise․ This streamlined process saves valuable time and reduces the potential for errors during setup․ The pre-aligned components minimize frustrating adjustments, ensuring a secure and properly functioning handle․

Furthermore, the Quick Fit design enhances durability and reliability․ By simplifying the installation, it reduces the risk of over-tightening screws or damaging the door frame․ The robust construction of the handle set itself contributes to long-lasting performance․ It addresses the weakness found in older designs, like a fillet on the outer handle․ Ultimately, the Quick Fit provides a hassle-free experience, delivering a secure and aesthetically pleasing solution for storm door hardware․
Tools Required for Installation
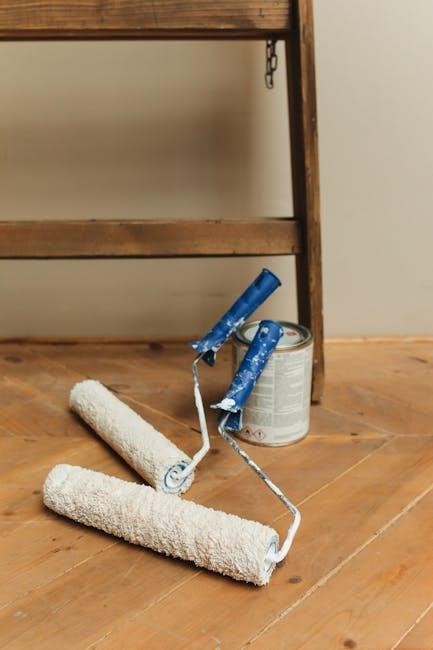
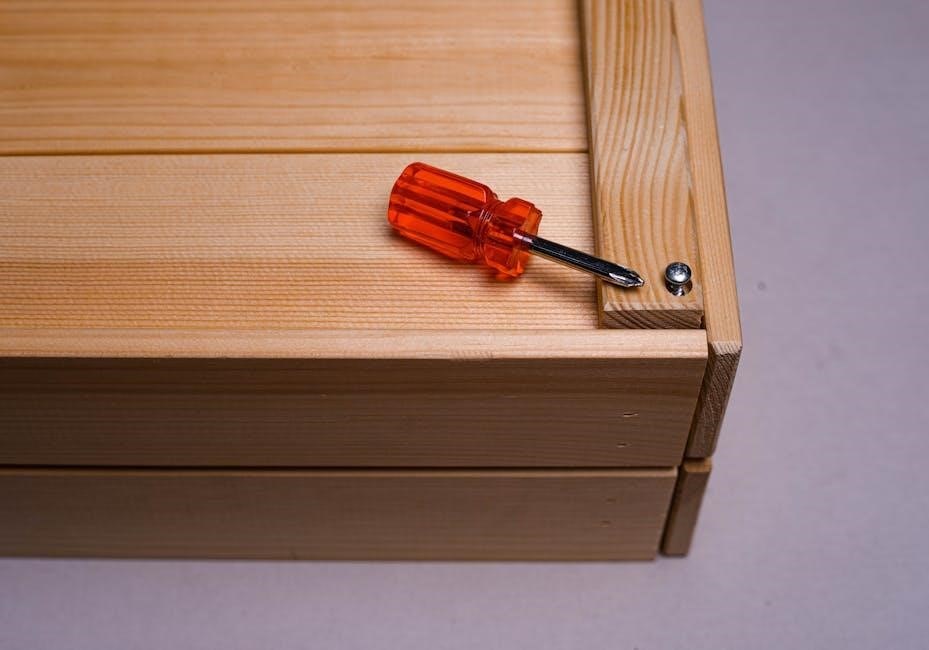
Successfully installing a Larson Quick Fit Handle Set requires only a few essential tools, making it a DIY-friendly project․ A standard Phillips head screwdriver is the primary tool needed for loosening and tightening screws during the removal of the old handle and the installation of the new one․ While not always necessary, a flathead screwdriver can be helpful for certain adjustments or prying․
Safety glasses are strongly recommended to protect your eyes from debris․ Depending on the condition of the existing hardware, a small amount of penetrating oil might be useful for loosening stubborn screws․ For troubleshooting stripped screws, a screw extractor set could prove invaluable․ Finally, having a clean cloth on hand is beneficial for wiping down the handle area and ensuring a clean installation․ These minimal requirements contribute to the Quick Fit design’s accessibility․

Package Contents Verification
Before beginning the installation, carefully verify the contents of your Larson Quick Fit Handle Set package․ A complete set typically includes the exterior handle, the interior handle, the connecting spindle, and the necessary mounting screws․ Ensure all components are present and undamaged․ Check for the exterior handle plate and the interior handle plate; these are crucial for a secure fit․
Compare the received parts against the parts list included in the packaging․ Missing components will halt the installation process․ Inspect each item for any manufacturing defects or shipping damage․ If anything is missing or damaged, immediately contact Larson Manufacturing’s customer support (details in the ‘Additional Resources’ section) before proceeding․ Proper verification prevents frustration and ensures a successful installation․

Step-by-Step Installation Process
This section provides a detailed, sequential guide for installing your Larson QuickFit handle set, from removing the old hardware to securing the new components effectively․
Removing the Old Handle Set
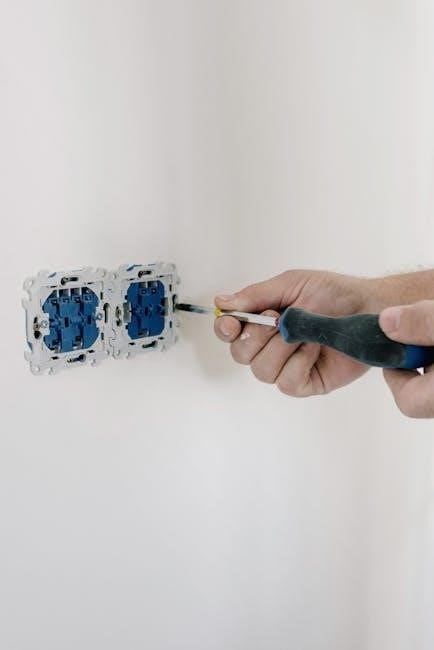
Begin by carefully removing the existing handle set to prepare the door for the QuickFit replacement․ First, loosen the screws securing the interior and exterior face plates; these are typically Phillips head screws․ Once loosened, gently remove both the interior and exterior handle assemblies․ Pay close attention to how the spindle connects – noting its orientation will aid in reassembly․
Disconnecting the spindle is crucial․ It may slide straight out, or require a slight lift while pulling․ Be mindful of any small connecting pieces or retaining clips that might be present․ Inspect the surrounding area for any damaged screws or worn components․ Removing the old set cleanly ensures a smooth installation of the new QuickFit handle, preventing alignment issues later on․ Retain the old screws if they are in good condition for potential reuse․
Loosening and Removing Screws
The initial step involves carefully loosening the screws that secure the existing handle set’s face plates․ Typically, these are Phillips head screws located on both the interior and exterior sides of the door․ Use a screwdriver that properly fits the screw head to avoid stripping․ Apply gentle, consistent pressure while turning; avoid forcing the screws, as this can damage the screw head or the surrounding door material․
Once loosened, fully remove the screws and retain them for potential reuse if they are in good condition․ Note their length and type, as the new QuickFit set may require similar dimensions․ After removing the screws, gently pull the face plates away from the door․ If they are stuck, a slight wiggle may help dislodge them․ Be cautious not to scratch or damage the door’s surface during removal․
Disconnecting the Spindle

With the face plates removed, the spindle – the square or rectangular rod connecting the interior and exterior handles – will be exposed․ Gently push the spindle towards either the interior or exterior side of the door to allow for removal․ In some cases, the spindle may be held in place by small set screws within the handle mechanisms; if present, loosen these screws before attempting to remove the spindle․
Once loosened or if no set screws are present, carefully slide the spindle out of the handles․ Avoid bending or damaging the spindle, as this could affect the functionality of the new handle set․ Inspect the spindle for any signs of wear or damage; if it’s significantly worn, it’s best to discard it and rely on the new spindle included with the QuickFit set․ Retain the old spindle for comparison if needed․
Preparing the Door for the Quick Fit Handle
After removing the old handle set, proper door preparation is crucial for a successful QuickFit installation․ Begin by thoroughly cleaning the handle area with a mild cleaning solution and a soft cloth․ Remove any dirt, grime, or old adhesive residue that might interfere with the new handle’s adhesion and alignment․ Ensure the surface is completely dry before proceeding․
Next, carefully check for proper alignment of the latch and strike plate․ The latch should smoothly extend and retract into the strike plate without binding․ If misalignment exists, loosen the strike plate screws and adjust its position until proper alignment is achieved․ Tighten the screws securely once aligned․ A properly prepared door ensures smooth operation and prevents future issues․
Cleaning the Handle Area
Before installing the QuickFit handle, a clean surface is paramount for optimal adhesion and a professional finish․ Begin by removing any existing debris – dust, dirt, old sealant, or paint flakes – from the door around the handle and latch locations․ Utilize a soft cloth dampened with a mild household cleaner, avoiding abrasive cleaners that could damage the door’s surface․
Pay close attention to crevices and corners where grime tends to accumulate․ A small brush, like an old toothbrush, can be helpful for reaching these areas․ Once cleaned, wipe the area with a clean, damp cloth to remove any cleaner residue․ Ensure the surface is completely dry before proceeding with the installation․ A clean, dry surface guarantees a secure and lasting installation of your new Larson handle․
Checking for Proper Alignment
Accurate alignment is crucial for smooth handle operation and secure latching․ After cleaning, carefully inspect the existing spindle hole and latch mortise on the door․ Ensure the hole is clear of obstructions and properly sized for the new QuickFit handle’s spindle․ Misalignment can cause binding, difficulty turning the handle, or even prevent the latch from engaging correctly․
Test the alignment by temporarily inserting the new spindle (without the handles attached) into the hole․ It should slide in smoothly without excessive force․ Also, verify that the latch bolt extends and retracts freely within the strike plate opening on the door frame․ If any resistance is felt, address the issue before proceeding – slight adjustments to the strike plate may be necessary to ensure a perfect fit and effortless operation․
Installing the Exterior Handle
Begin with the exterior handle installation, ensuring a secure and weatherproof fit․ First, carefully insert the spindle through the exterior handle, aligning it with the prepared spindle hole in the door․ Ensure the spindle is fully seated within the handle mechanism․ Next, position the exterior handle plate against the door surface, aligning the screw holes․
Secure the exterior handle plate using the provided screws․ Tighten the screws gradually and evenly, avoiding over-tightening, which could strip the screw holes or damage the handle․ Once the plate is firmly attached, test the handle’s rotation to confirm smooth movement․ Verify that the spindle engages correctly with the latch mechanism, allowing for proper door operation․ A snug, but not overly tight, fit is ideal․
Inserting the Spindle
The spindle insertion is a crucial step in the exterior handle installation process․ Carefully take the spindle – the metal shaft connecting the handles – and align one end with the receiving hole within the exterior handle․ Gently push the spindle through, ensuring it passes completely through the handle’s internal mechanism․
Next, guide the opposite end of the spindle towards the corresponding hole in the door itself․ It should slide in smoothly; if resistance is met, double-check the alignment of both the handle and the door’s opening․ Ensure the spindle extends far enough to eventually connect with the interior handle․ Proper spindle insertion is vital for the handle to function correctly, enabling the door to latch and unlatch effectively․
Securing the Exterior Handle Plate
With the spindle correctly inserted, attention turns to securing the exterior handle plate․ Align the exterior handle plate with the pre-drilled holes on the door’s surface, ensuring a flush and even fit․ Take the provided screws – typically of a specific length and head type for this handle set – and carefully insert them through the plate’s holes․
Begin tightening the screws gradually and in a criss-cross pattern․ This prevents uneven pressure and potential warping of the handle plate․ Avoid over-tightening, as this could strip the screw holes or damage the handle itself․ Tighten until the plate is firmly secured against the door, with no noticeable movement or gaps․ A properly secured exterior handle plate provides stability and a professional finish․
Installing the Interior Handle
Now, focus on installing the interior handle, completing the handle set assembly․ Begin by carefully positioning the interior handle plate against the door, aligning it with the protruding spindle from the exterior handle․ Ensure the handle orientation is correct – typically, the handle should allow for smooth operation when pushed down or turned․
Once aligned, attach the interior handle plate using the screws provided․ Similar to the exterior plate, tighten these screws gradually in a criss-cross pattern to ensure even pressure and prevent damage․ Avoid over-tightening․ The goal is a secure fit without stripping the screw holes․ This step completes the mechanical linkage of the handle set, preparing for final adjustments․
Attaching the Interior Handle Plate
Begin by carefully aligning the interior handle plate with the pre-drilled holes on the door’s interior side․ Ensure the plate sits flush against the door surface, covering the spindle opening․ The plate’s orientation is crucial; confirm it matches the exterior handle plate for consistent operation․
Using the provided screws, gently start fastening the plate․ It’s recommended to initially insert all screws loosely before tightening any of them fully․ This allows for minor adjustments to ensure perfect alignment․ Tighten the screws in a diagonal pattern – top left, bottom right, top right, bottom left – to distribute pressure evenly and prevent warping or damage to the door or plate․ Avoid excessive force to prevent stripping the screw holes․
Connecting the Spindle to the Interior Handle
With the interior handle plate securely attached, carefully insert the spindle through the corresponding opening in the handle․ Ensure the spindle’s flat sides align with the flat sections within both the exterior and interior handle mechanisms․ A smooth, unobstructed insertion indicates proper alignment; forcing it could damage the components․
Once the spindle is fully inserted, verify it engages correctly with the exterior handle’s mechanism․ Rotate the handles to test the connection – they should move in unison, operating the latch smoothly․ If resistance is felt, double-check the alignment of the spindle and handle components․ A properly connected spindle is vital for the handle set’s functionality, ensuring effortless door operation and secure locking․

Adjustments and Troubleshooting
This section addresses common issues, including handle tightness, alignment problems, stripped screws, and latch malfunctions, providing solutions for a perfectly functioning Larson door handle․
Adjusting Handle Tightness
Achieving the correct handle tightness is crucial for smooth operation and preventing future issues․ If the handle feels loose after installation, gently tighten the mounting screws on both the interior and exterior handle plates․ Avoid over-tightening, as this can strip the screw holes or damage the handle components․ Tighten incrementally, checking the handle’s feel after each adjustment․
If the handle is difficult to turn, it may be too tight․ Slightly loosen the mounting screws until the handle operates smoothly․ A small amount of lubricant, such as silicone spray, can also be applied to the spindle where it enters the handle plates to reduce friction․ Regularly check the tightness of the screws, especially after initial use, as they may loosen slightly over time․ Consistent monitoring and minor adjustments will ensure long-lasting, effortless handle operation․
Addressing Alignment Issues
Proper alignment between the exterior and interior handles is essential for a functional lock․ If the handles don’t align correctly, the spindle may bind, making it difficult to operate the latch․ Begin by loosening the mounting screws on both handle plates, allowing for slight adjustments․ Gently manipulate the handles until they align smoothly, ensuring the spindle inserts freely without resistance․
Check the strike plate alignment on the door frame․ If misaligned, the latch bolt may not extend properly, causing binding․ Loosen the strike plate screws and adjust its position until the latch bolt engages smoothly․ Retighten all screws securely after alignment is achieved․ If significant misalignment persists, inspect the door and frame for warping or damage, which may require professional repair․
Dealing with Stripped Screws
Encountering stripped screws during handle installation is frustrating, but solvable․ First, attempt using a rubber band or steel wool placed between the screwdriver and screw head to gain better grip․ Apply firm, steady pressure while turning slowly․ If this fails, a screw extractor kit is highly recommended; these tools are designed to grip and remove damaged screws․
For severely stripped screws, consider using a manual impact driver․ This tool delivers a rotational force with each hammer strike, often loosening stubborn screws․ As a last resort, carefully drill out the screw head using a drill bit slightly smaller than the screw’s shaft․ Once the head is removed, the remaining shaft can often be extracted with pliers․ Always use caution to avoid damaging the door or handle components․
Troubleshooting Latch Problems
If the latch isn’t engaging smoothly, several issues could be present․ First, ensure proper alignment between the latch bolt and strike plate on the door frame․ Loosen the strike plate screws and adjust its position until the latch engages securely with a clean, positive click․ Check for obstructions within the strike plate opening – debris or paint buildup can hinder smooth operation․
If the handle feels loose or the latch doesn’t retract fully, examine the spindle connecting the interior and exterior handles․ Confirm it’s fully inserted and properly aligned․ A worn or damaged latch mechanism may require replacement; contact Larson’s customer support for assistance identifying the correct replacement part․ Finally, verify the door isn’t binding against the frame, as this can put undue stress on the latch․

Safety Precautions
Always prioritize safety during installation; wear safety glasses to protect your eyes and avoid over-tightening screws, which could damage the door or handle set․
Wearing Safety Glasses
Protecting your eyes is paramount during the Larson QuickFit handle set installation․ Removing old hardware, particularly screws, can generate small metal fragments or debris that pose a risk of eye injury․ These particles, though often microscopic, can cause irritation, scratches, or more serious damage if they enter your eyes․
Therefore, always wear appropriate safety glasses throughout the entire installation process․ Ensure the glasses fit snugly and provide adequate coverage around your eyes․ Standard eyeglasses or reading glasses do not offer sufficient protection; dedicated safety glasses with side shields are recommended․
Even if you feel confident in your skills, unexpected situations can arise․ A screw head might shatter, or a piece of the old handle could break off unexpectedly․ Prioritizing eye protection is a simple yet crucial step to ensure a safe and successful installation experience, preventing potential discomfort and medical issues․
Avoiding Over-Tightening Screws
A common mistake during installation of the Larson QuickFit handle set is over-tightening the screws․ While ensuring a secure fit is important, excessive force can easily damage the door, the handle components, or strip the screw holes, leading to significant problems․ Stripped screw holes render the handle unstable and require complex repairs․
Use a manual screwdriver instead of a power drill whenever possible, granting greater control over the applied torque․ When using a drill, set it to a low clutch setting․ Tighten screws until they are snug and offer resistance, but avoid applying further pressure․
Feel for resistance – that’s your cue to stop․ Regularly check the tightness of screws during and after installation․ If a screw feels loose, tighten it slightly, but again, avoid overdoing it․ Gentle and deliberate tightening preserves the integrity of the door and handle set, ensuring long-lasting functionality․

Additional Resources
For further assistance, explore Larson Manufacturing’s website for detailed guides, FAQs, and contact information for customer support, including helpful 3D installation videos․
Larson Manufacturing Website
Larson Manufacturing’s official website serves as a central hub for all things related to their door and window products, including comprehensive resources for the QuickFit Handle Set․ You’ll find detailed product specifications, downloadable installation manuals in PDF format, and frequently asked questions addressing common issues encountered during the installation process․
The website also features a robust support section where you can submit inquiries directly to their customer service team․ Beyond installation guidance, the Larson website provides information on warranty claims, replacement parts, and other helpful resources to ensure your door continues to function optimally․ Regularly updated with new content, it’s the first place to look for the latest information and troubleshooting tips related to your Larson door and its components․ Explore their online catalog to discover compatible accessories and upgrades․
Customer Support Contact Information
For personalized assistance with your Larson QuickFit Handle Set installation, reaching out to their customer support team is a valuable option․ While specific contact details may evolve, generally, you can find support options through the Larson Manufacturing website․ Look for a “Contact Us” or “Support” section, typically offering phone support, email submission forms, and potentially live chat features․
Be prepared to provide your product model number and a detailed description of the issue you’re encountering․ Having photos or videos of the installation process or the problem area can also expedite the support process․ Larson’s representatives are equipped to guide you through troubleshooting steps, clarify installation instructions, and assist with any warranty-related inquiries․ Prompt and helpful support ensures a smooth experience․
3D Animation Installation Videos
Larson Manufacturing recognizes the value of visual learning, and offers 3D animation installation videos to complement their QuickFit Handle Set instructions․ These videos, often available on platforms like YouTube and the Larson website, provide a dynamic and clear demonstration of each installation step․ A video created in Maxon Cinema 4D and Adobe After Effects specifically showcases the QuickFit handle installation process․
These animations are particularly helpful for visualizing the internal mechanisms and proper alignment of components․ They allow you to pause, rewind, and replay sections as needed, ensuring a thorough understanding before proceeding․ Searching online for “Larson QuickFit Handle Installation Video” will quickly surface these resources, offering a valuable supplement to the written guide and enhancing your installation success․