The Divine Mercy Chaplet is a powerful Catholic devotion revealed by Jesus to Saint Faustina, offering spiritual benefits and divine promises. It provides comfort, forgiveness, and mercy, especially for the dying. Available in PDF, it’s a convenient way to pray anytime, anywhere.
Overview of the Divine Mercy Chaplet
The Divine Mercy Chaplet is a Catholic prayer revealed by Jesus to Saint Faustina, emphasizing God’s mercy and forgiveness. It consists of prayers recited on rosary beads, including the Eternal Father, For the Sake of His Sorrowful Passion, and Holy God. The chaplet is typically prayed daily, especially at 3 PM, the Hour of Mercy. Its purpose is to implore divine mercy for oneself, others, and the world. The chaplet is simple yet profound, offering spiritual comfort and promising grace, particularly for the dying. Available in PDF, it’s easily accessible for personal or group devotion, fostering a deeper connection to God’s mercy.
Significance of the Chaplet in Catholic Devotion
The Divine Mercy Chaplet holds profound significance in Catholic devotion as a powerful prayer of intercession and mercy. It emphasizes God’s infinite compassion and forgiveness, offering solace to the dying and spiritual renewal for all. The chaplet’s promises, as revealed to Saint Faustina, include grace at the hour of death and mercy for those who pray it faithfully. Its simplicity makes it accessible to everyone, fostering a deeper connection to Christ’s divine mercy. Available in PDF, it serves as a vital tool for personal and communal prayer, inspiring conversion and trust in God’s boundless love and forgiveness.
Origins and History of the Divine Mercy Chaplet
The Divine Mercy Chaplet was revealed to Saint Faustina Kowalska in 1935, offering a powerful prayer for divine mercy and forgiveness, becoming a cornerstone of Catholic devotion worldwide.
The Revelation to Saint Faustina Kowalska
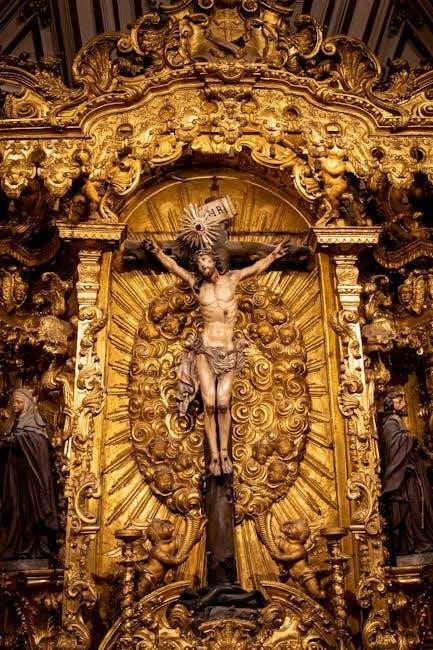
In September 1935, Jesus revealed the Divine Mercy Chaplet to Saint Faustina Kowalska in Vilnius, Lithuania. He entrusted her to spread this prayer as a means of obtaining divine mercy and forgiveness. The Chaplet was given to Faustina as a powerful intercession for the salvation of souls, emphasizing God’s infinite mercy. Jesus promised extraordinary graces to those who prayed the Chaplet, especially for the dying. Faustina recorded the revelation in her diary, detailing the prayer’s structure and its purpose to appease God’s justice and bring mercy to the world. This revelation became the foundation of the Divine Mercy movement.
Historical Background of the Chaplet
The Divine Mercy Chaplet originated in 1935 when Jesus revealed it to Saint Faustina Kowalska in Vilnius, Lithuania. Initially met with skepticism, the Chaplet gained acceptance after Faustina’s diary was widely read. In 1978, the Vatican lifted a ban on its promotion, and in 2000, Pope John Paul II officially approved it. The Chaplet became a global devotion, with millions praying it daily. Its popularity grew further through initiatives like “Koronka na Ulicach” (Chaplet in the Streets), where people gather publicly to pray. Today, the Chaplet is a cornerstone of the Divine Mercy movement, offering mercy and forgiveness to all who pray it.
The Purpose of the Chaplet as Revealed by Jesus
Jesus revealed the Chaplet to Saint Faustina as a prayer to appease His divine justice and seek mercy for humanity. Its purpose is to offer reparation for sins and to implore divine forgiveness for the world. Jesus emphasized that the Chaplet is a powerful means to obtain His mercy, especially for the dying, and to bring solace to the sorrowful. It is a gift from Jesus to humanity, intended to be prayed with trust and sincerity, offering comfort and hope to all who recite it faithfully. The Chaplet embodies Jesus’ call to trust in His infinite mercy and compassion.
Structure of the Divine Mercy Chaplet
The Chaplet includes an opening prayer, the Our Father, Hail Mary, and Apostle’s Creed. Large beads feature the Eternal Father prayer, while small beads include the For the Sake of His Sorrowful Passion prayer. It concludes with a closing prayer and the Holy God, Holy Mighty, Holy Immortal prayer thrice. A PDF guide provides detailed instructions for praying the Chaplet.
Components of the Chaplet
The Divine Mercy Chaplet consists of the Our Father, Hail Mary, and Apostle’s Creed, followed by the Eternal Father prayer on large beads. Small beads feature the For the Sake of His Sorrowful Passion prayer. It concludes with the Holy God, Holy Mighty, Holy Immortal prayer, repeated three times. The Chaplet is prayed on rosary beads, with each section dedicated to specific intentions. A PDF guide outlines these components clearly, making it easy to follow and pray. This structure reflects the revelations to Saint Faustina, emphasizing mercy, forgiveness, and divine grace.
Instructions for Praying on Small Beads
To pray the Divine Mercy Chaplet on small beads, begin with the Sign of the Cross. On each small bead, recite the prayer: “For the sake of His sorrowful Passion, have mercy on us and on the whole world.” Repeat this prayer ten times for each decade. The Chaplet is typically prayed on a standard rosary, which includes five decades of small beads. After completing the small beads, conclude with the Holy God, Holy Mighty, Holy Immortal prayer, repeated three times. A PDF guide provides clear instructions for this structure, ensuring a proper and meaningful prayer experience.
Instructions for Praying on Large Beads

When praying the Divine Mercy Chaplet on large beads, begin by reciting the prayer: “Holy God, Holy Mighty, Holy Immortal, have mercy on us and on the whole world.” This prayer is repeated three times on the large beads, typically at the beginning or end of the Chaplet. The large beads are often used to invoke divine mercy and emphasize the significance of the prayer. A PDF guide provides detailed instructions, ensuring proper structure and intentionality. This method allows for a focused and meaningful prayer experience, aligning with the devotion’s purpose of seeking God’s mercy and forgiveness.
Significance and Promises of the Chaplet
The Divine Mercy Chaplet, revealed to Saint Faustina, offers profound spiritual benefits, including divine mercy, forgiveness, and protection. Praying it brings comfort and strengthens faith in God’s loving mercy.
Promises Associated with the Chaplet
The Divine Mercy Chaplet holds profound promises, as revealed by Jesus to Saint Faustina. Praying it with trust brings immense spiritual benefits, including mercy for the dying, grace at the hour of death, and protection from divine justice. Jesus promised that souls who pray the Chaplet will be embraced by His mercy, and their homes will be sanctuaries of peace. The Chaplet also offers a powerful means to obtain forgiveness for sins and to bring solace to the sorrowful. These promises underscore its significance as a devotion that fosters hope, healing, and a deeper connection to God’s infinite mercy.
Spiritual Benefits of Praying the Chaplet
Praying the Divine Mercy Chaplet offers profound spiritual benefits, fostering trust in God’s mercy and deepening faith. It helps believers experience inner peace, consolation, and a closer relationship with Christ. The Chaplet is particularly powerful for the dying, offering comfort and assurance of divine forgiveness. By praying it, one can grow in humility, compassion, and love for others. The Chaplet also strengthens the soul against spiritual darkness and despair, reminding us of God’s infinite love and mercy. Its recitation cultivates a spirit of prayer and devotion, making it a vital part of a vibrant spiritual life.
How to Pray the Divine Mercy Chaplet
The Divine Mercy Chaplet is prayed on a rosary. Begin with the Our Father, Hail Mary, and Apostle’s Creed. On each large bead, pray the Our Father and Hail Mary. On the small beads, repeat “For the sake of His sorrowful Passion, have mercy on us and on the whole world.” Conclude with three repetitions of the Holy God, Holy Mighty One, and the final prayer.
Step-by-Step Guide to Praying the Chaplet
Begin with the Our Father, Hail Mary, and Apostle’s Creed on the large beads. On each small bead, pray “For the sake of His sorrowful Passion, have mercy on us and on the whole world.” Repeat this prayer ten times per decade. After five decades, conclude with the Holy God, Holy Mighty One prayer, repeated three times. End with the final prayer: “Eternal God, in whom mercy is endless and the treasury of compassion inexhaustible, look kindly upon us and increase Your mercy in us, that in difficult moments we might not despair nor become despondent.”
Prayer Text and Translations
The Divine Mercy Chaplet is available in PDF format, featuring the complete prayer text in multiple languages, including Polish, English, and Spanish. The chaplet begins with the Our Father, Hail Mary, and Apostle’s Creed, followed by the central prayer: “For the sake of His sorrowful Passion, have mercy on us and on the whole world.” This prayer is repeated on each small bead. The chaplet concludes with the Holy God prayer and the final invocation to Eternal God. Translations ensure global accessibility, allowing devotees worldwide to pray in their native tongues, fostering unity in devotion to Divine Mercy.
Divine Mercy Chaplet in PDF Format
The Divine Mercy Chaplet is available in PDF format, offering the complete prayer text, instructions for small and large beads, promises, and a sung version. Ideal for personal or group devotion, it provides a convenient way to pray anytime, anywhere, while staying true to the revelations given to Saint Faustina.
Downloading the Chaplet in PDF
Downloading the Divine Mercy Chaplet in PDF format is a convenient way to access the prayer text, instructions, and promises revealed to Saint Faustina. Many Catholic websites offer free PDF downloads, allowing devotees to print or share the Chaplet easily. The PDF typically includes the prayer for small and large beads, along with translations and sung versions. It serves as a portable resource for personal or group prayer, ensuring the Divine Mercy message reaches everyone. By downloading the Chaplet, individuals can deepen their devotion and share its spiritual benefits with others worldwide.

Using the PDF for Personal and Group Prayer
The Divine Mercy Chaplet PDF is a versatile tool for both personal and communal devotion. Individuals can use it for quiet reflection, while groups can pray together, fostering unity and spiritual growth. The PDF’s clear format makes it easy to follow, whether at home, in church, or during outdoor events like Koronka na Ulicach. Many communities print the PDF for distribution, ensuring everyone can participate. Its portability and accessibility make it ideal for sharing the Divine Mercy message in various settings, inspiring prayer and mercy worldwide.

The Role of the Chaplet in the Divine Mercy Movement
The Chaplet is a cornerstone of the Divine Mercy Movement, uniting believers worldwide in prayer and promoting God’s mercy. Its availability in PDF enhances accessibility for global devotion.
The Chaplet as a Core Devotion
The Divine Mercy Chaplet is a central devotion in the Catholic Church, revealed by Jesus to Saint Faustina. It emphasizes God’s infinite mercy and forgiveness, offering comfort to the faithful. The Chaplet’s simplicity and profound meaning make it accessible to all, fostering a deeper connection with Christ. Its availability in PDF format has further popularized this prayer, enabling widespread dissemination. As a core devotion, it is prayed on beads, with specific instructions for small and large beads, and is often recited during the Hour of Mercy. The Chaplet’s promises, such as divine mercy for the dying, have made it a beloved prayer worldwide.
Its Impact on the Global Catholic Community
The Divine Mercy Chaplet has profoundly impacted the global Catholic community, uniting believers in prayer and fostering a culture of mercy. Its availability in PDF has made it accessible worldwide, enabling millions to pray individually or in groups. Initiatives like “Koronka na Ulicach” (Chaplet in the Streets) have brought people together at street crossings, creating a visible witness of faith. Annual celebrations and prayer campaigns further amplify its reach, inspiring spiritual renewal and a deeper understanding of God’s mercy. This devotion has become a unifying force, transcending borders and languages, and offering comfort and hope to countless Catholics globally.

Modern-Day Initiatives and Events
Modern initiatives like “Koronka na Ulicach” (Chaplet in the Streets) and annual Divine Mercy celebrations have revitalized the devotion globally, fostering unity and spreading God’s mercy.
Koronka na Ulicach (Chaplet in the Streets)
Koronka na Ulicach is a global initiative where devotees gather at street crossings to pray the Divine Mercy Chaplet. Begun in 2008, it occurs annually on September 28th, uniting thousands worldwide. Participants pray for mercy, forgiveness, and peace, reflecting the Chaplet’s mission to spread divine compassion. This public devotion strengthens faith and fosters community, inspiring others to embrace God’s mercy. Available in PDF, the Chaplet’s text and instructions guide participants, ensuring unity in prayer across languages and cultures, making it a powerful modern expression of ancient spiritual traditions.
Annual Celebrations and Prayer Campaigns
Annual celebrations and prayer campaigns for the Divine Mercy Chaplet are global events fostering unity and devotion. Key dates include September 28th, marking the Chaplet’s revelation, and May 18th, honoring Saint Faustina’s birth. These events feature public prayers, processions, and reflections on mercy. The Chaplet is often prayed collectively at street crossings, uniting thousands worldwide. PDF resources provide essential guides for participants, ensuring everyone can join in prayer. These campaigns emphasize the Chaplet’s role in seeking divine forgiveness and spreading God’s mercy, inspiring spiritual renewal and community bonding among believers across the globe.

Spiritual and Theological Insights
The Divine Mercy Chaplet embodies the Trinitarian nature of God, emphasizing Christ’s sacrifice and divine forgiveness. It reflects humanity’s need for mercy and redemption through prayer.

Theological Foundations of the Chaplet

The Divine Mercy Chaplet is deeply rooted in Catholic theology, emphasizing God’s infinite mercy and love. It reflects the Trinitarian nature of God, highlighting Christ’s sacrifice and the Holy Spirit’s role in imparting divine forgiveness. The Chaplet underscores the Eucharistic presence of Christ, offering a profound expression of devotion to His mercy. By invoking God’s mercy, the prayer aligns with the Church’s teachings on redemption and salvation. Its theological core lies in the belief that mercy is an attribute of God’s divine love, accessible through prayer and trust in His infinite compassion.
Reflections on Mercy and Forgiveness
The Divine Mercy Chaplet embodies the essence of divine mercy, offering a heartfelt plea for forgiveness and compassion. Rooted in Jesus’ revelation to Saint Faustina, it emphasizes trust in God’s infinite mercy. The Chaplet invites believers to reflect on the depth of God’s love, urging them to seek forgiveness and extend mercy to others. Its repetition of “Have mercy on us and on the whole world” underscores the universal call to compassion. This prayer fosters a deeper understanding of mercy as a transformative force, guiding individuals to live with humility, love, and trust in God’s boundless forgiveness.

Conclusion
The Divine Mercy Chaplet, revealed to Saint Faustina, is a profound prayer of mercy and forgiveness. Available in PDF, it offers a timeless guide for seeking divine compassion and spreading God’s love globally.
Final Thoughts on the Divine Mercy Chaplet
The Divine Mercy Chaplet, revealed to Saint Faustina, embodies Jesus’ promise of mercy and forgiveness. Its simplicity and depth make it a universal prayer for all seeking divine compassion. Available in PDF, it offers a convenient guide for personal and communal devotion, ensuring accessibility worldwide. The chaplet’s focus on mercy resonates deeply in a world needing healing and forgiveness. By praying it, believers can experience spiritual renewal and share God’s love. Embracing this devotion fosters a closer relationship with Christ and spreads His message of mercy globally, fulfilling its purpose as a powerful tool for spiritual transformation and unity.
Encouragement to Embrace the Chaplet
Embracing the Divine Mercy Chaplet enriches your spiritual life with its promises of mercy and forgiveness. Available in PDF, it’s easily accessible for personal or group prayer, offering a simple yet profound way to connect with God’s love. Praying the chaplet fosters hope, comfort, and peace, especially in challenging times. By incorporating it into your daily routine, you can deepen your faith and share Christ’s mercy with others. Let the chaplet be a beacon of light, guiding you toward a life filled with divine compassion and grace. Open your heart to this beautiful devotion and experience its transformative power.