Pedal Tractor Value Guide: A Comprehensive Overview (Updated February 18‚ 2026)
Welcome‚ collectors! This guide‚ updated today‚ February 18‚ 2026‚ explores the fascinating world of pedal tractor collecting.
Discover how these miniature machines‚ once cherished toys‚ now represent a tangible link to American agricultural history and hold significant value.
These weren’t simply playthings; they mirrored real farm equipment‚ evolving from early cast iron models to those incorporating modern plastics.
Understanding this evolution is key to assessing value‚ alongside condition‚ rarity‚ and originality.
We’ll delve into key manufacturers‚ valuation resources‚ and current market trends‚ providing insights for both seasoned collectors and those just beginning their journey.
Auction results and price guides are essential tools for navigating this unique market.
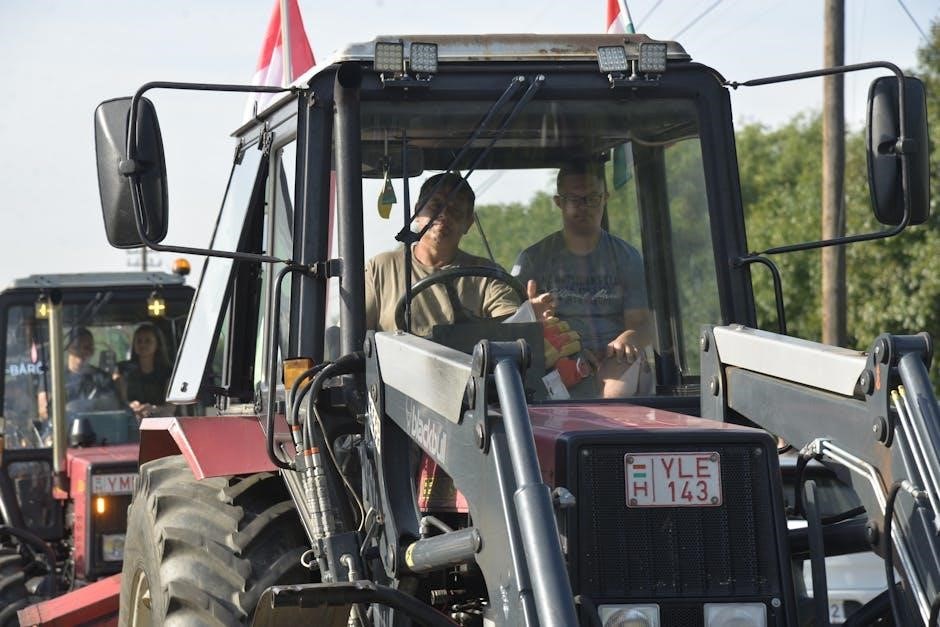
Pedal tractors represent more than just childhood nostalgia; they are captivating collectibles embodying a significant slice of American agricultural heritage. Originating as miniature replicas of full-sized farm machinery‚ these foot-powered vehicles provided children with a playful connection to the world of farming. Initially constructed from durable cast iron‚ early 20th-century models showcased intricate detailing and robust construction‚ qualities highly sought after by today’s collectors.
Over time‚ manufacturing techniques evolved‚ incorporating materials like steel and‚ eventually‚ plastic. This shift influenced both production costs and the overall aesthetic of pedal tractors. However‚ regardless of the era‚ these charming relics weren’t merely toys; they were aspirational symbols of rural life and industriousness. Their enduring appeal lies in their ability to evoke fond memories and represent a simpler time.
Today‚ the pedal tractor collecting hobby thrives‚ fueled by a growing appreciation for their historical significance and craftsmanship. Understanding their evolution‚ from early cast iron designs to later plastic models‚ is crucial for anyone interested in exploring this fascinating world. The value of a pedal tractor is determined by a complex interplay of factors‚ which we will explore in detail.
Historical Significance of Pedal Tractors
Pedal tractors emerged during a pivotal era in American history – the mechanization of agriculture. As farms transitioned from manual labor to machine-powered operations‚ companies began producing scaled-down versions of their iconic tractors for children. These weren’t simply toys; they were miniature representations of the powerful machines transforming the American landscape.
The early 20th century saw the rise of companies like John Deere and International Harvester‚ and their pedal tractor counterparts quickly became popular. These toys mirrored the designs of their full-sized counterparts‚ fostering a sense of connection between children and the agricultural world. They reflected the pride and innovation associated with farming‚ becoming symbols of rural American life.
The evolution of pedal tractor design paralleled advancements in tractor technology. From the robust cast iron models of the early years to the lighter‚ more streamlined designs incorporating steel and plastic‚ each generation reflects the changing times. Collecting these tractors is‚ therefore‚ akin to collecting a tangible history of American agriculture and its impact on society. Their enduring presence speaks to a lasting cultural legacy.
Why Pedal Tractors are Collectible
The appeal of pedal tractors to collectors stems from a unique blend of nostalgia‚ historical significance‚ and aesthetic charm. These weren’t mass-produced‚ disposable toys; they represented a substantial investment for families and were often cherished for generations. This inherent quality contributes to their collectibility today.
Beyond personal memories‚ pedal tractors offer a tangible connection to American agricultural heritage. They embody a simpler time‚ evoking images of rural life and the hardworking individuals who shaped the nation’s food supply. Collectors appreciate owning a piece of that history.
Furthermore‚ the variety of models‚ manufacturers‚ and production years creates a diverse collecting landscape. From rare‚ limited-edition tractors to iconic designs from John Deere and International Harvester‚ there’s something for every collector. The thrill of the hunt‚ combined with the potential for appreciating value‚ fuels the passion. Their status as charming relics further enhances their desirability in the vintage market.
Key Manufacturers and Brands
Several brands dominate the pedal tractor collecting world‚ each with unique characteristics and value propositions.
John Deere‚ International Harvester‚ and Allis-Chalmers are particularly prominent‚ offering a diverse range of collectible models for enthusiasts.
John Deere Pedal Tractors: Value and Popularity
John Deere consistently ranks as a top favorite among pedal tractor collectors‚ largely due to the brand’s iconic status and widespread recognition in American agriculture. This strong brand loyalty translates directly into higher market values‚ particularly for well-preserved and original models.
Early John Deere pedal tractors‚ especially those manufactured before the 1970s‚ are highly sought after. Collectors often prioritize models that accurately replicate full-size John Deere tractors of the same era‚ appreciating the attention to detail and historical accuracy. The condition significantly impacts value; pristine examples command substantial premiums.
Specific models‚ like those featuring unique decals or limited-edition paint schemes‚ can fetch exceptional prices. While a general 1980s pedal tractor might fall within the $100-$140 range‚ certain John Deere models from earlier decades can easily exceed several hundred dollars‚ depending on rarity and condition. Online auction sites like eBay and TractorHouse frequently showcase John Deere pedal tractors‚ providing a real-time view of current market trends and pricing.
The enduring appeal of John Deere‚ combined with the nostalgia associated with childhood memories‚ ensures continued demand and solid investment potential for collectors.
International Harvester Pedal Tractors: Identifying Valuable Models
International Harvester pedal tractors represent a significant segment of the collector’s market‚ offering a diverse range of models with varying degrees of value. Identifying the most desirable pieces requires understanding key features and historical context.
The International Hydro 100 Wide Front‚ for example‚ currently holds a strong market position‚ with recent sales reaching $445.00. This model’s popularity stems from its distinctive design and relative scarcity compared to other International Harvester offerings. Early models‚ particularly those with original paint and decals‚ are highly prized.
Collectors should pay close attention to the model number and year of manufacture‚ as these details directly influence value. Limited-edition or promotional models‚ often released in conjunction with agricultural events‚ can command substantial premiums. Condition is paramount; tractors in excellent working order with minimal wear and tear will always fetch higher prices.
Resources like Crisswell’s Pedal Tractor Guide Book and online auction results on platforms like eBay provide valuable insights into current market values and help identify potentially valuable International Harvester models.
Allis-Chalmers Pedal Tractors: A Collector’s Focus
Allis-Chalmers pedal tractors‚ while perhaps not as widely represented as John Deere or International Harvester‚ hold a dedicated following among collectors. Their distinctive orange color and unique designs contribute to their appeal and collectible value.
Identifying valuable Allis-Chalmers models requires a keen eye for detail and an understanding of production variations. Early models‚ particularly those manufactured in the 1950s and 1960s‚ are often highly sought after due to their rarity and historical significance. Condition plays a crucial role; original paint‚ decals‚ and working mechanisms significantly enhance a tractor’s worth.
Collectors often focus on specific Allis-Chalmers tractor models‚ seeking out those that accurately replicate their full-size counterparts. Limited-edition or promotional versions‚ though less common‚ can command premium prices. Auction results and price guides‚ such as Crisswell’s‚ are invaluable resources for determining current market values.
Exploring online marketplaces like 1stDibs and TractorHouse can reveal available Allis-Chalmers pedal tractors and provide insights into prevailing market trends. Careful research and a discerning eye are essential for building a valuable Allis-Chalmers collection.
Factors Influencing Pedal Tractor Value
Several key elements dictate a pedal tractor’s worth. Condition‚ rarity‚ originality‚ and the year of manufacture all play vital roles in determining its market value and collector appeal.
Condition: Assessing Wear and Tear
Evaluating a pedal tractor’s condition is paramount when determining its value. Collectors meticulously assess the extent of wear and tear‚ as this significantly impacts price. A tractor in pristine‚ all-original condition commands a substantial premium. However‚ realistically‚ most vintage tractors will exhibit some degree of wear.
Key areas to inspect include the paint – is it original‚ repainted‚ or heavily chipped? Rust is a common issue‚ particularly on older‚ cast iron models. Examine the tires for cracks‚ wear‚ or replacements. Check the functionality of the steering and pedals; smooth operation is desirable. Scratches‚ dents‚ and other cosmetic imperfections will detract from the value‚ though minor flaws are often acceptable;
Restoration can be a double-edged sword. While a professional restoration can improve appearance‚ it may diminish originality‚ potentially lowering the value for some collectors. A well-documented‚ sympathetic restoration – preserving as much original material as possible – is generally preferred. Ultimately‚ a detailed and honest assessment of the condition is crucial for accurate valuation.
Rarity: Limited Edition and Hard-to-Find Models
Rarity is a major driver of value in the pedal tractor collecting world. Certain models were produced in limited quantities‚ making them highly sought after by enthusiasts. These limited editions‚ or those with unique features‚ often command significant premiums over more common tractors.
Identifying rare models requires research. Collectors consult price guides‚ auction records‚ and online marketplaces like 1stDibs and TractorHouse to understand production numbers and market demand. Variations in paint schemes‚ decals‚ or included accessories can also indicate a rare variant. Early cast iron models‚ particularly those from lesser-known manufacturers‚ are often scarce.
Hard-to-find tractors aren’t always limited editions; sometimes‚ they were simply produced for a shorter period or in smaller regional batches. The International Hydro 100 Wide Front‚ for example‚ is a desirable model due to its relative scarcity. A tractor’s rarity‚ combined with its condition and originality‚ ultimately determines its collectible value.
Originality: Maintaining Authenticity
Originality is paramount when assessing a pedal tractor’s value. Collectors prioritize tractors that retain their original components – paint‚ decals‚ tires‚ and even minor hardware. Any modifications or replacements can significantly diminish a tractor’s worth‚ even if the replacements are of high quality.
Restoration is a delicate balance. While a complete restoration might improve a tractor’s appearance‚ it can also detract from its originality. Many collectors prefer tractors with original patina‚ even if it shows signs of wear and tear‚ over those that have been heavily restored. A sympathetic cleaning and preservation approach is often favored.
Authenticity verification involves careful examination of markings‚ paint codes‚ and manufacturing details. Comparing a tractor to known original examples‚ documented in resources like Crisswell’s Pedal Tractor Guide Book‚ is crucial. Maintaining originality preserves the tractor’s historical integrity and maximizes its appeal to serious collectors‚ directly impacting its market value.
Year of Manufacture: Impact on Value
The age of a pedal tractor is a significant determinant of its value‚ though not always straightforward. Generally‚ earlier models – those produced before the 1960s – command higher prices due to their rarity and historical significance. These often feature cast iron construction and represent the earliest iterations of these miniature machines.
However‚ the 1980s models also hold appeal‚ particularly to collectors who fondly remember them from their childhood; As evidenced by current market data (February 18‚ 2026)‚ a vintage 1980s pedal tractor can range from $100 to $140‚ demonstrating a consistent demand.
Specific models and limited editions from any era can buck the trend. A well-preserved International Hydro 100 Wide Front‚ for example‚ currently sells for around $445.00. Therefore‚ researching the production years and specific features of a tractor is vital to accurately assess its worth. Understanding the timeline of pedal tractor evolution is key to successful collecting.
Valuation Resources and Price Guides
Accurate valuation requires utilizing reliable resources. Crisswell’s Pedal Tractor Guide Book (1940-2013) provides historical data‚ while eBay and TractorHouse offer current auction results. 1stDibs showcases market pricing.
Crisswell’s Pedal Tractor Guide Book (1940-2013)
Brent Smith and Steve Noble’s The Revised Crisswell’s Pedal Tractor Guide Book (1940-2013)‚ published by Hachette Book Group/Motorbooks in 2014 (ISBN: 9780615881386)‚ remains a cornerstone resource for serious pedal tractor collectors. This comprehensive guide meticulously catalogs a vast array of models manufactured between 1940 and 2013‚ offering detailed information crucial for accurate identification and valuation.
Beyond simply listing models‚ Crisswell’s provides valuable insights into manufacturer histories‚ production variations‚ and distinguishing features. Collectors rely on this book to understand the nuances that differentiate common models from rare and highly sought-after pieces. The guide includes photographs and descriptions that aid in identifying even subtle differences‚ helping to determine authenticity and originality.
While auction results provide a snapshot of current market values‚ Crisswell’s offers a historical context‚ allowing collectors to track price trends and understand the factors influencing value over time. It’s an essential tool for establishing a baseline valuation and making informed decisions when buying‚ selling‚ or assessing a pedal tractor’s worth. However‚ remember to supplement the book’s information with current market data for the most accurate appraisal.
Online Auction Results (eBay‚ TractorHouse)
Real-time auction data from platforms like eBay and TractorHouse provides the most dynamic and current insights into pedal tractor values. Unlike static price guides‚ auction results reflect actual transactions and current market demand‚ offering a more accurate assessment of what collectors are willing to pay.
eBay is a particularly valuable resource‚ hosting a high volume of pedal tractor listings. Carefully analyzing completed auctions – focusing on models similar in condition and originality to the one being evaluated – reveals prevailing price ranges. Pay attention to shipping costs‚ as these can significantly impact the final price.
TractorHouse.com‚ while primarily focused on full-size tractors‚ frequently features pedal tractor auctions‚ particularly those associated with larger collections or estate sales. This platform often attracts a more specialized audience‚ potentially leading to higher bids on desirable models.
Remember that auction results can fluctuate based on seasonality‚ model rarity‚ and the overall economic climate. Consistently monitoring these platforms and comparing multiple data points is crucial for establishing a reliable valuation. Price guides offer benchmarks‚ but auction results are demonstrably more reliable.
1stDibs: Vintage Pedal Tractor Marketplace
1stDibs presents a curated marketplace specializing in high-end vintage items‚ including antique pedal tractors. Unlike broader auction sites‚ 1stDibs focuses on quality and authenticity‚ attracting a discerning clientele willing to invest in well-preserved or restored pieces.
Pricing on 1stDibs generally reflects a premium compared to eBay or TractorHouse‚ due to the platform’s vetting process and emphasis on dealer-provided descriptions and condition reports. This makes it an excellent resource for understanding the upper end of the market and identifying exceptional examples.
The platform’s global reach connects collectors with dealers worldwide‚ offering a diverse selection of models and styles. Searching for specific brands or models can reveal rare finds and provide valuable comparative data. Detailed photographs and descriptions are standard‚ aiding in accurate assessment.
While not necessarily indicative of average market value‚ 1stDibs showcases the potential value of pristine or historically significant pedal tractors. It’s a valuable tool for establishing aspirational pricing and understanding collector preferences within the vintage toy market. Explore listings to gauge current trends and dealer expertise.

Recent Market Values (as of February 18‚ 2026)
Current data reveals 1980s pedal tractors typically range from $100 to $140. A standout example‚ the International Hydro 100 Wide Front‚ recently sold for $445.00‚ demonstrating potential value.
1980s Pedal Tractors: Typical Price Range ($100-$140)
The 1980s represent a significant era for pedal tractor collectors‚ offering a sweet spot between affordability and nostalgic appeal. Generally‚ pedal tractors originating from this decade fall within a typical price range of $100 to $140‚ making them accessible entry points for new enthusiasts.
However‚ this range is a broad generalization. Several factors within this period can influence the final sale price. Models in exceptional condition‚ with minimal wear and tear‚ naturally command higher values‚ potentially exceeding the $140 mark. Conversely‚ tractors requiring restoration or exhibiting significant damage will likely sell closer to the $100 end of the spectrum.
Brand recognition also plays a role. While many 1980s tractors were produced by smaller‚ lesser-known manufacturers‚ those bearing the names of industry giants like John Deere or International Harvester often attract more attention and‚ consequently‚ higher bids. The presence of original decals and accessories further enhances desirability. A tractor received new in the 1980s‚ even needing a tire‚ can still be a good find.
Market fluctuations and regional demand also contribute to price variations. Online auction platforms and local sales can yield different results‚ so thorough research is crucial before buying or selling.
Specific Model Example: International Harvester Hydro 100 Wide Front ($445.00)
The International Harvester Hydro 100 Wide Front pedal tractor serves as a compelling case study in pedal tractor valuation. As of February 18‚ 2026‚ this particular model is currently achieving a market value of $445.00‚ significantly exceeding the typical price range for 1980s tractors.
This elevated price point is attributable to several key factors. The “Wide Front” designation denotes a less common variation‚ immediately increasing its collectibility. The Hydro 100 itself is a desirable model‚ known for its robust construction and realistic features. Action Toys currently lists this model‚ highlighting its demand.
Condition is paramount; examples in excellent‚ original condition – with intact decals‚ functional hydraulics (if applicable)‚ and minimal rust – command premium prices. Recent auction results on platforms like TractorHouse and eBay demonstrate consistent sales within this $400-$450 range.
Collectors actively seek out this model‚ driving up demand and‚ consequently‚ the price. It’s a prime example of how specific features‚ brand recognition‚ and overall condition can dramatically influence a pedal tractor’s worth‚ showcasing the potential for investment within this hobby.